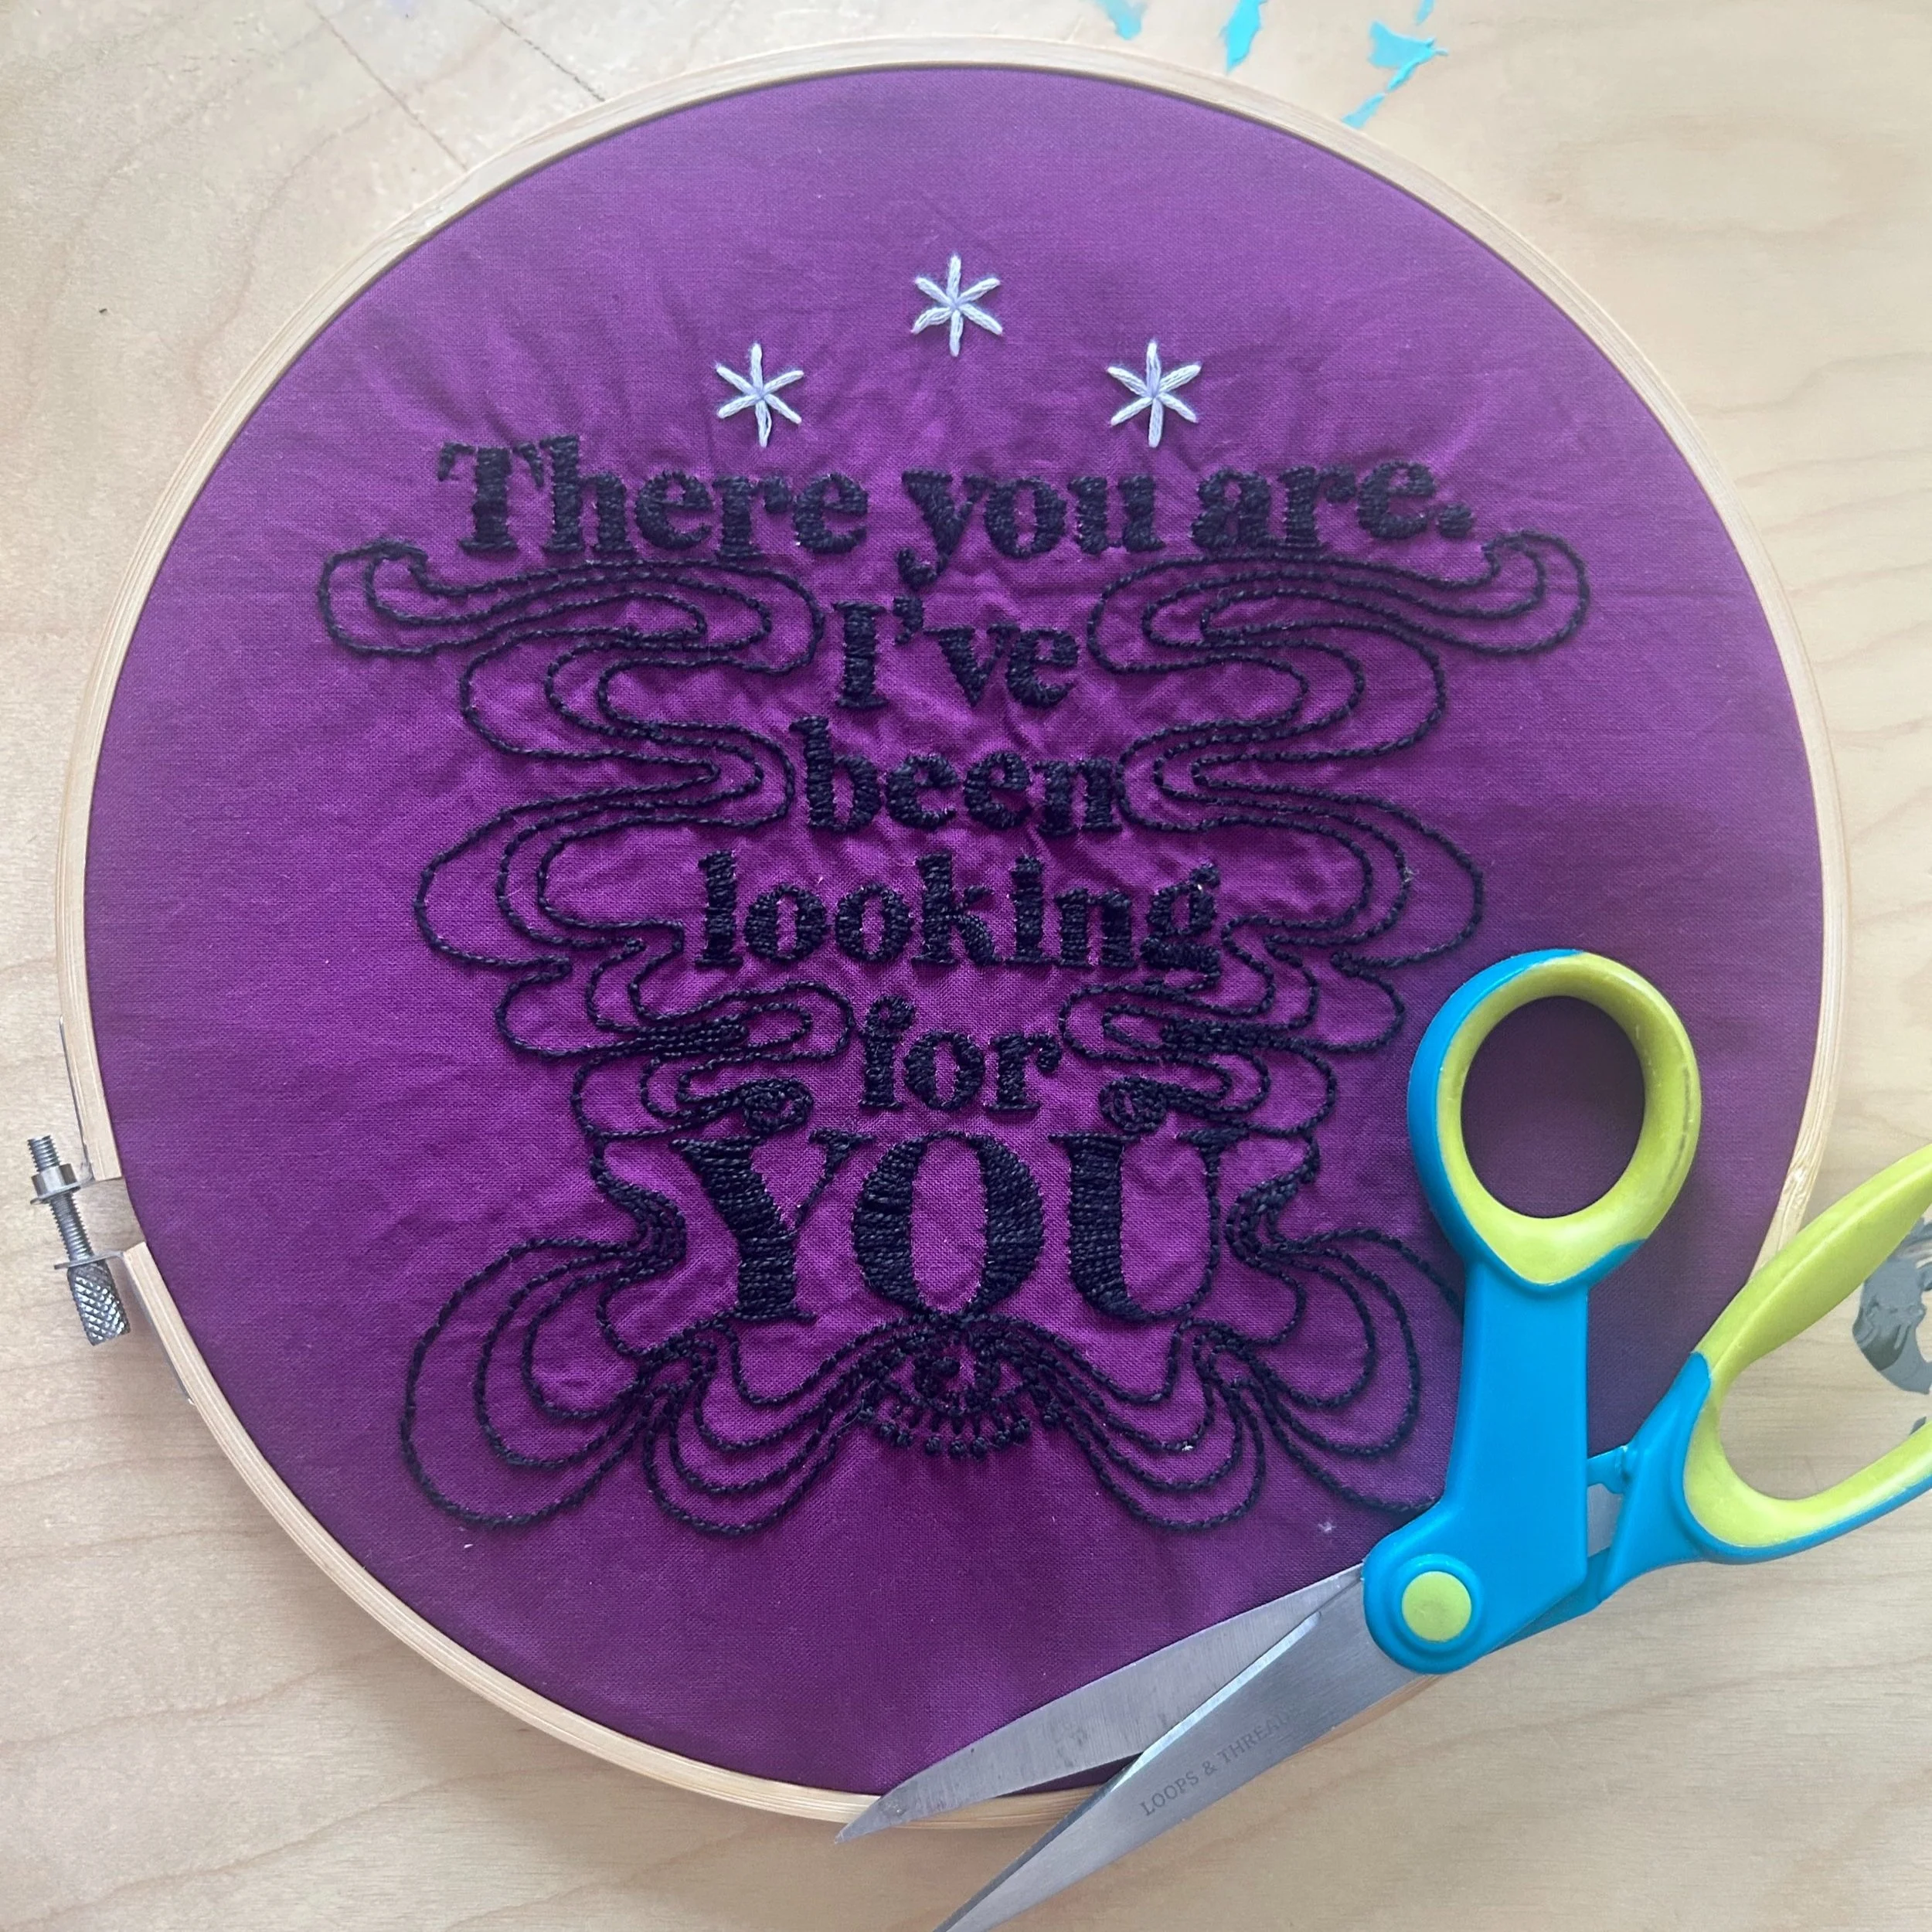
Satin Stitch
Satin Stitch
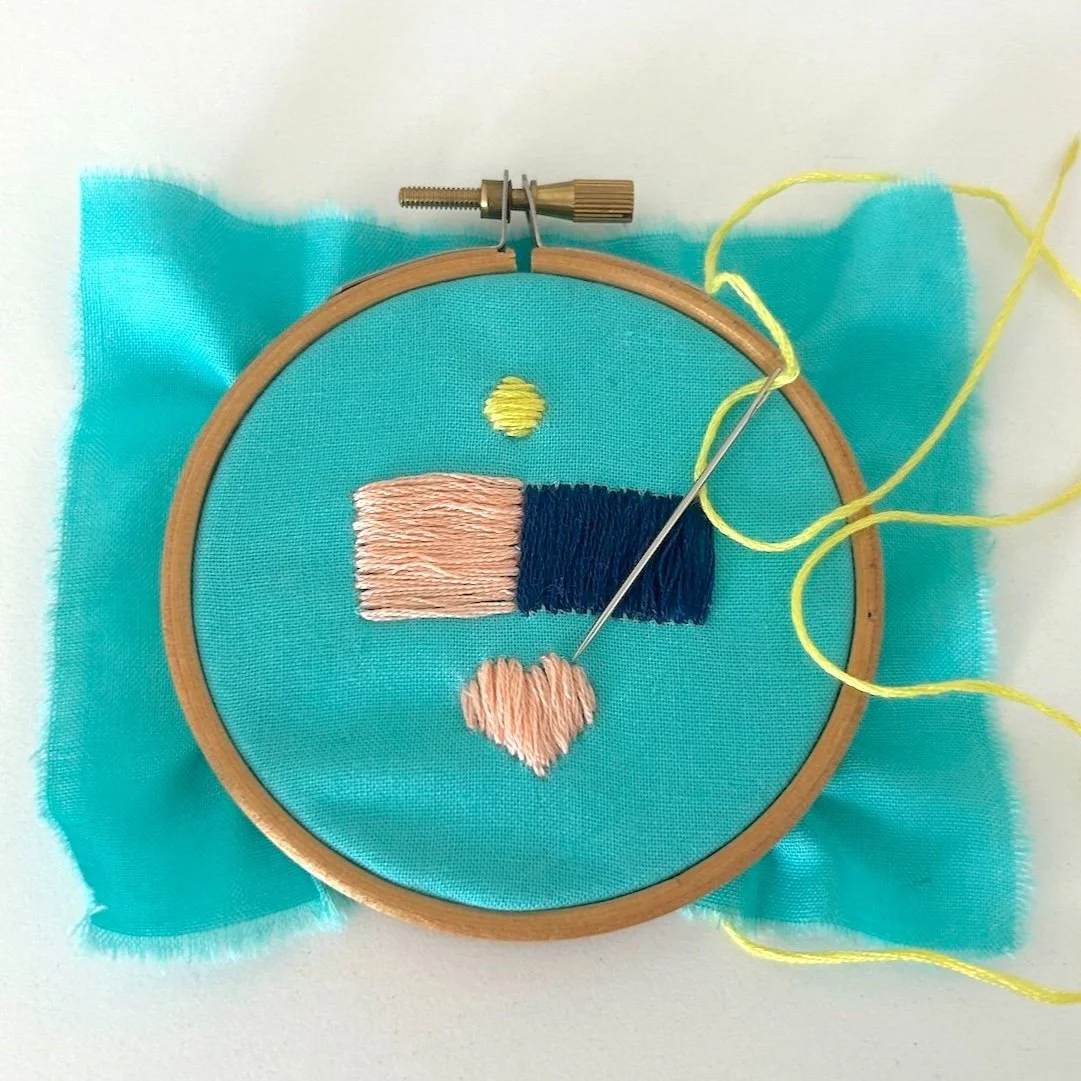
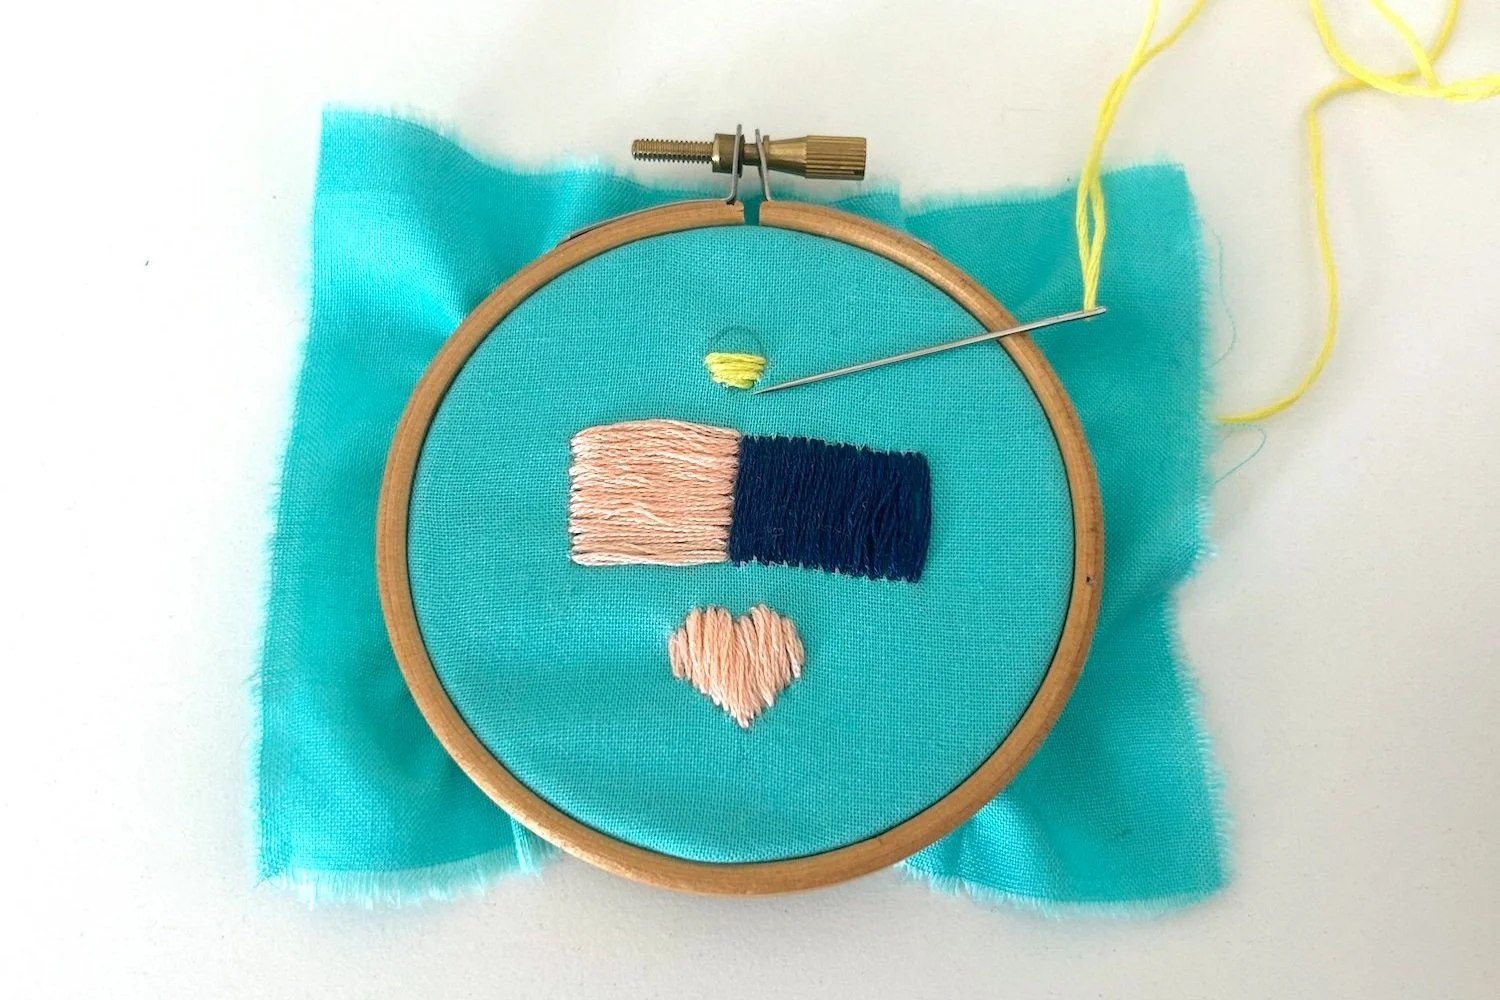
A basic stitch used to fill shapes.
Embroidery is a craft filled with various stitches that lend depth, texture, and beauty to fabric. Among these, the satin stitch holds a special place as one of the most elegant and versatile embroidery techniques. Known for its smooth, glossy finish like satin fabric, the satin stitch allows you to fill spaces with solid blocks of color, making it ideal for creating polished, professional-looking designs. Whether you're new to embroidery or looking to perfect your satin stitch technique, this blog post will provide you with everything you need to know about this classic stitch.
In this comprehensive guide, we’ll explore the history of the satin stitch, break down the steps to master it, share tips for achieving a flawless finish, and offer creative ideas for incorporating the satin stitch into your embroidery projects.
What is Satin Stitch?
The satin stitch is a technique used to create a smooth, shiny surface by laying flat, closely spaced stitches next to each other. The name "satin stitch" comes from the way it mimics the sheen of satin fabric, as the stitches lie flat and reflect light, giving your embroidery a lustrous, polished appearance.
Satin stitches are typically used to fill in shapes or motifs in embroidery designs. The stitch is versatile and can be used for filling in large areas, such as flower petals or leaves, as well as for smaller, intricate details like lettering or embellishments. Depending on the type of thread used and the angle of the stitches, the satin stitch can have different visual effects, from a bold, block-like appearance to a delicate, subtle sheen.
How to Create a Satin Stitch
Materials You Will Need
Embroidery hoop for maintaining tension
Embroidery thread (floss) in your chosen color
Embroidery needle
Scissors
Steps to Make a Satin Stitch
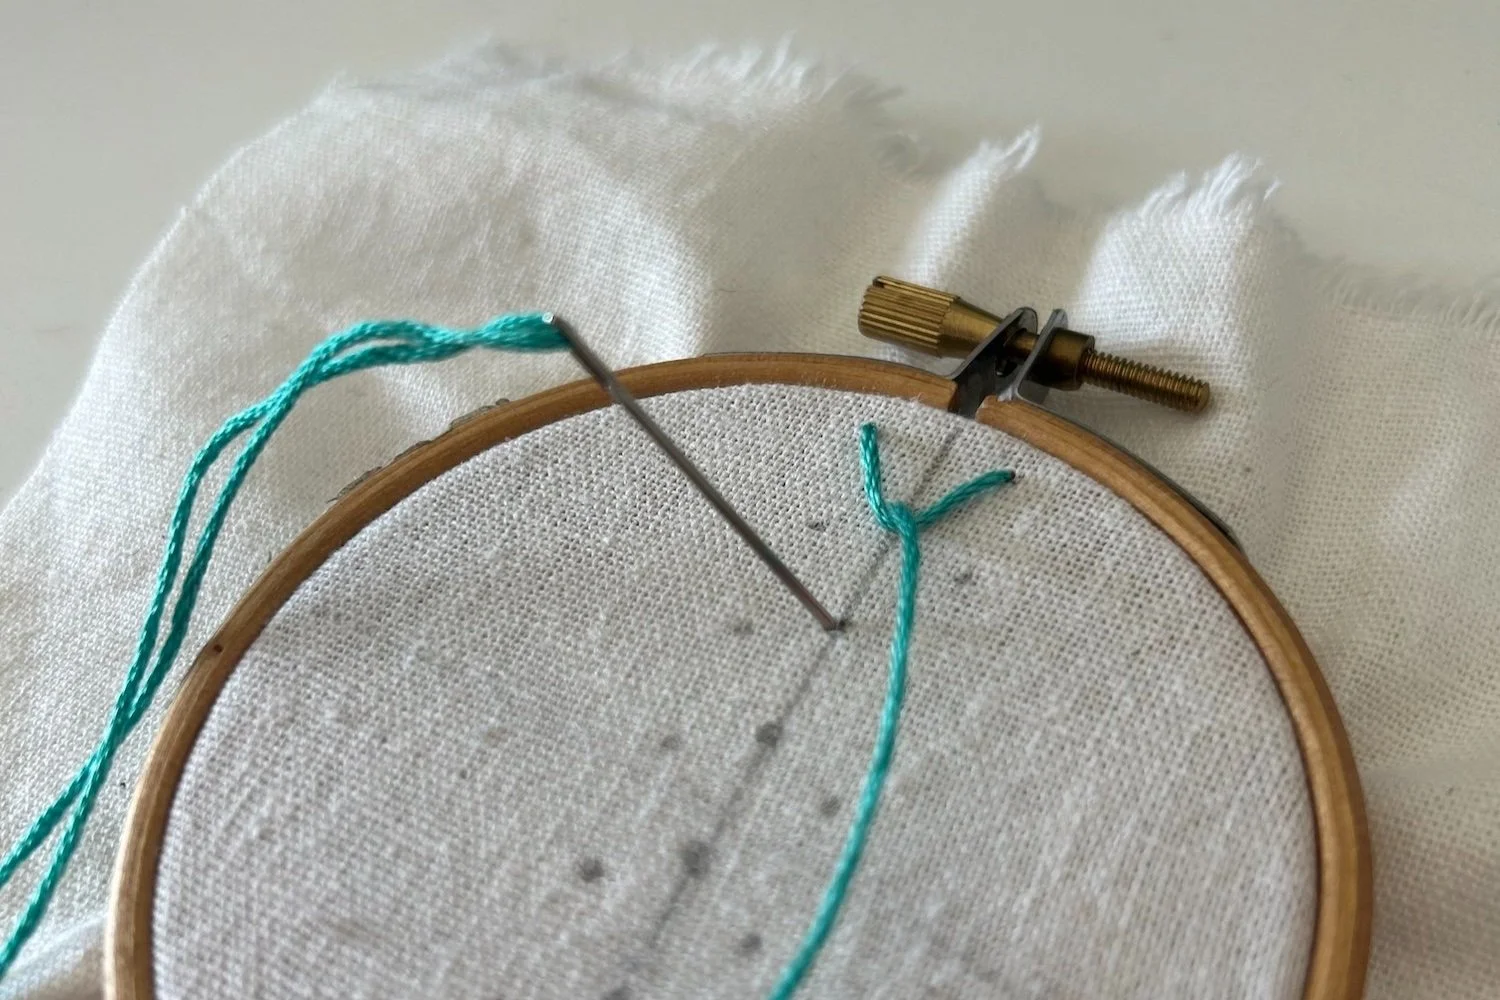
Step 1 Prepare your materials: Start by securing your fabric in an embroidery hoop to keep it taut and wrinkle-free. Thread your embroidery needle with about 18-24 inches of floss and tie a small knot at the end of the thread to anchor it.
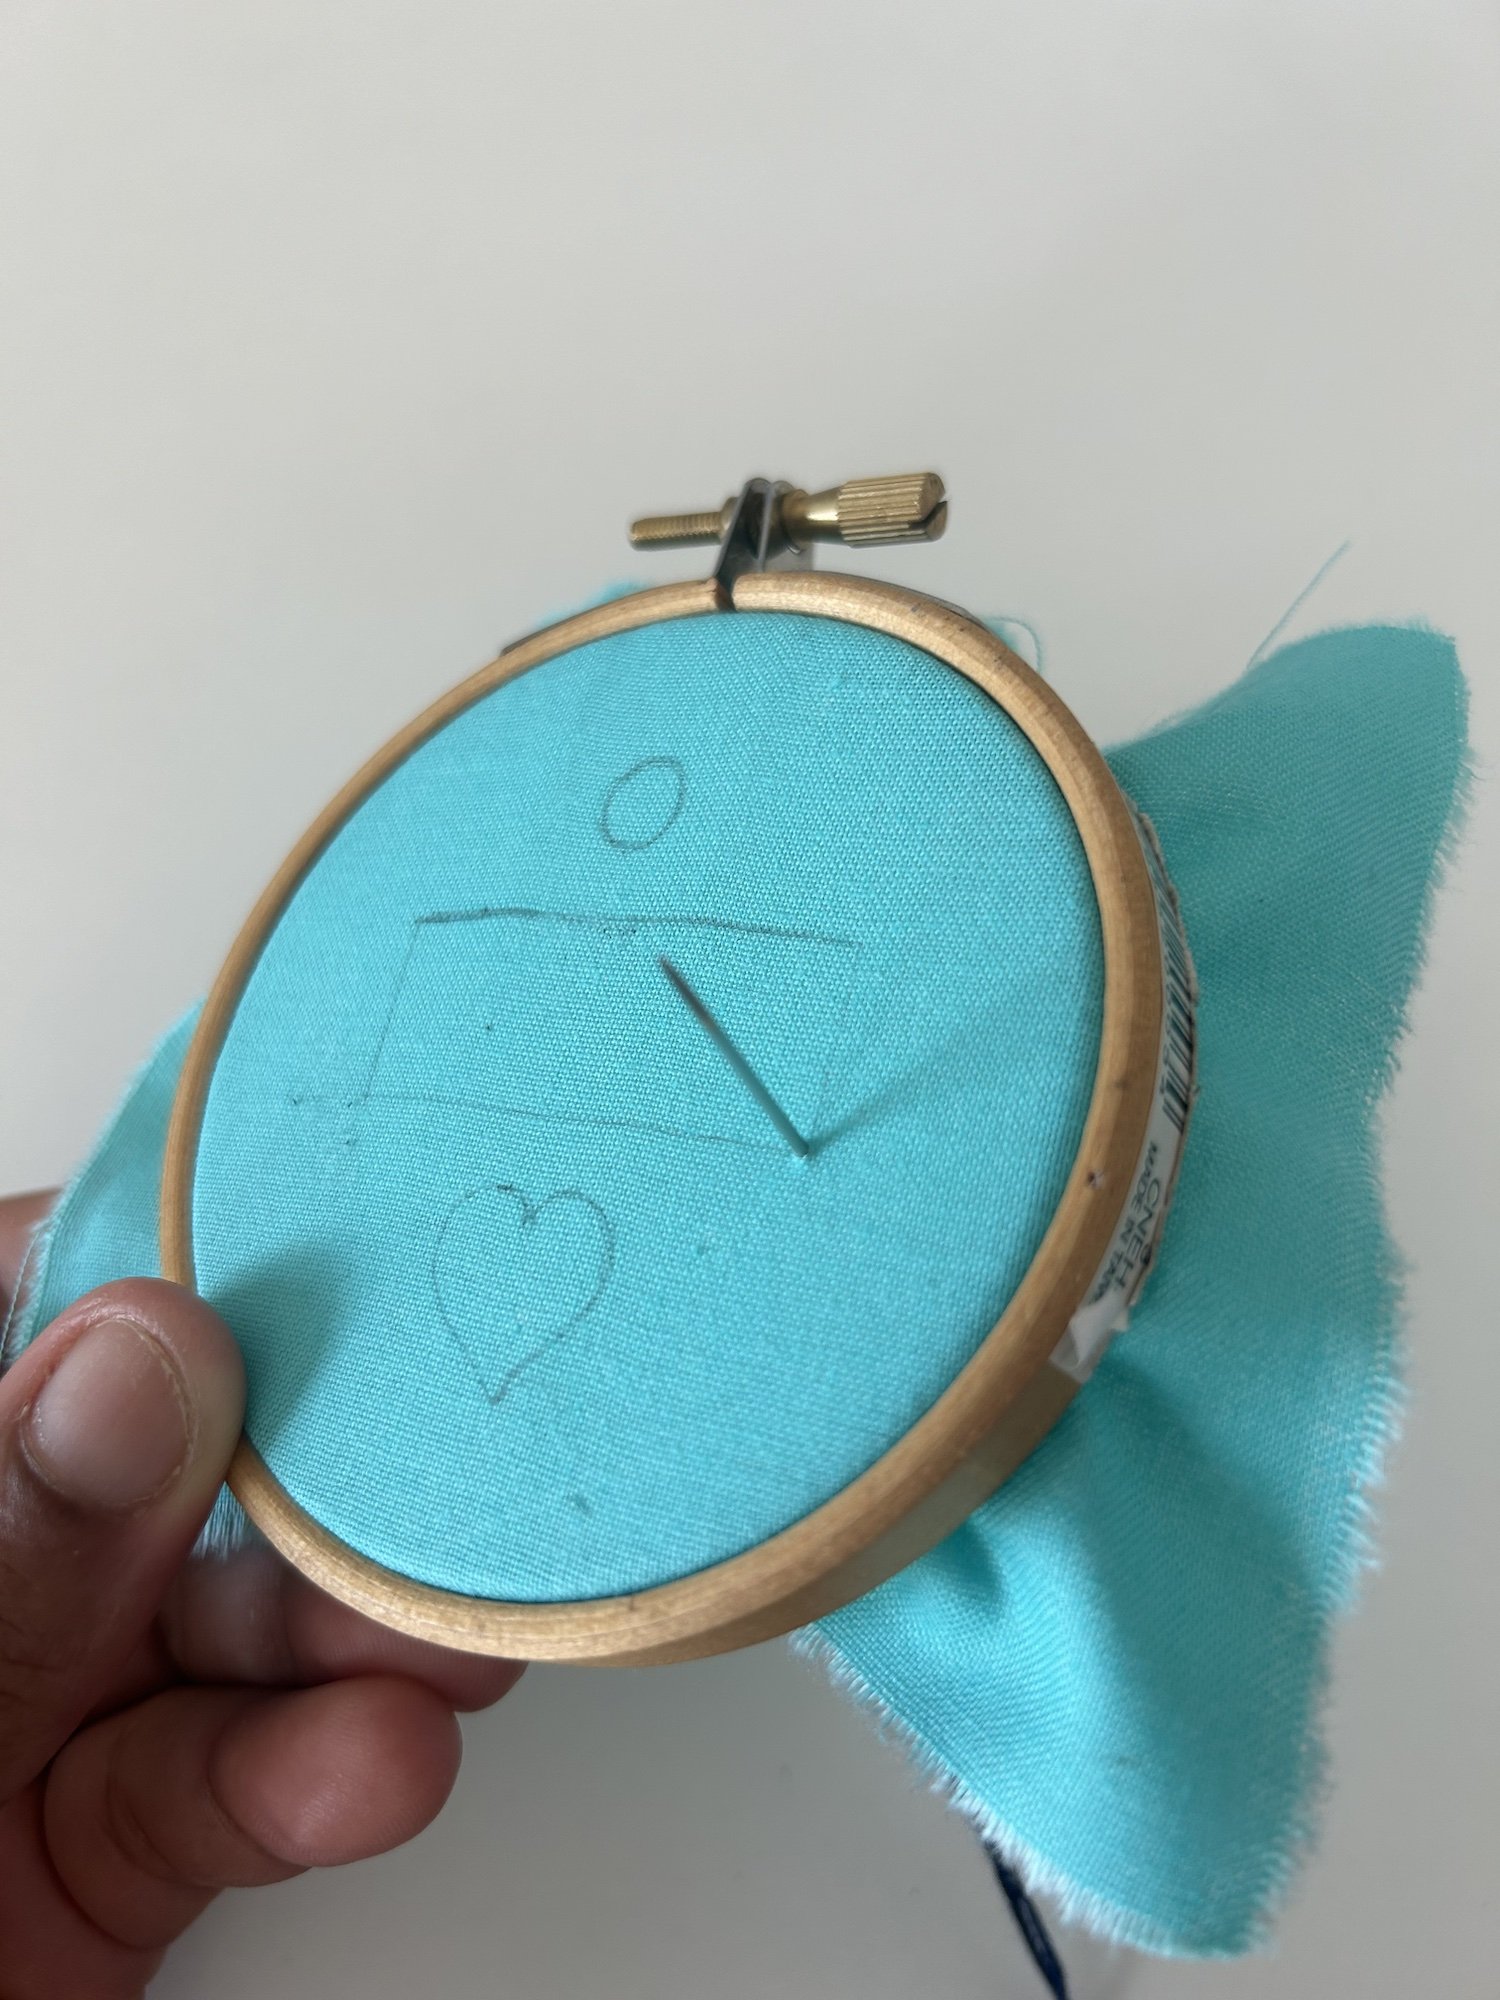
Step 2 Mark your design: If you’re filling a shape, lightly trace the outline of the area you want to fill with a fabric-safe marker or pencil. This will help guide your stitches and ensure they stay within the boundaries.
Step 3 Thread your needle: Thread your embroidery needle with about 18-24 inches of floss and tie a small knot at the end of the thread to anchor it.
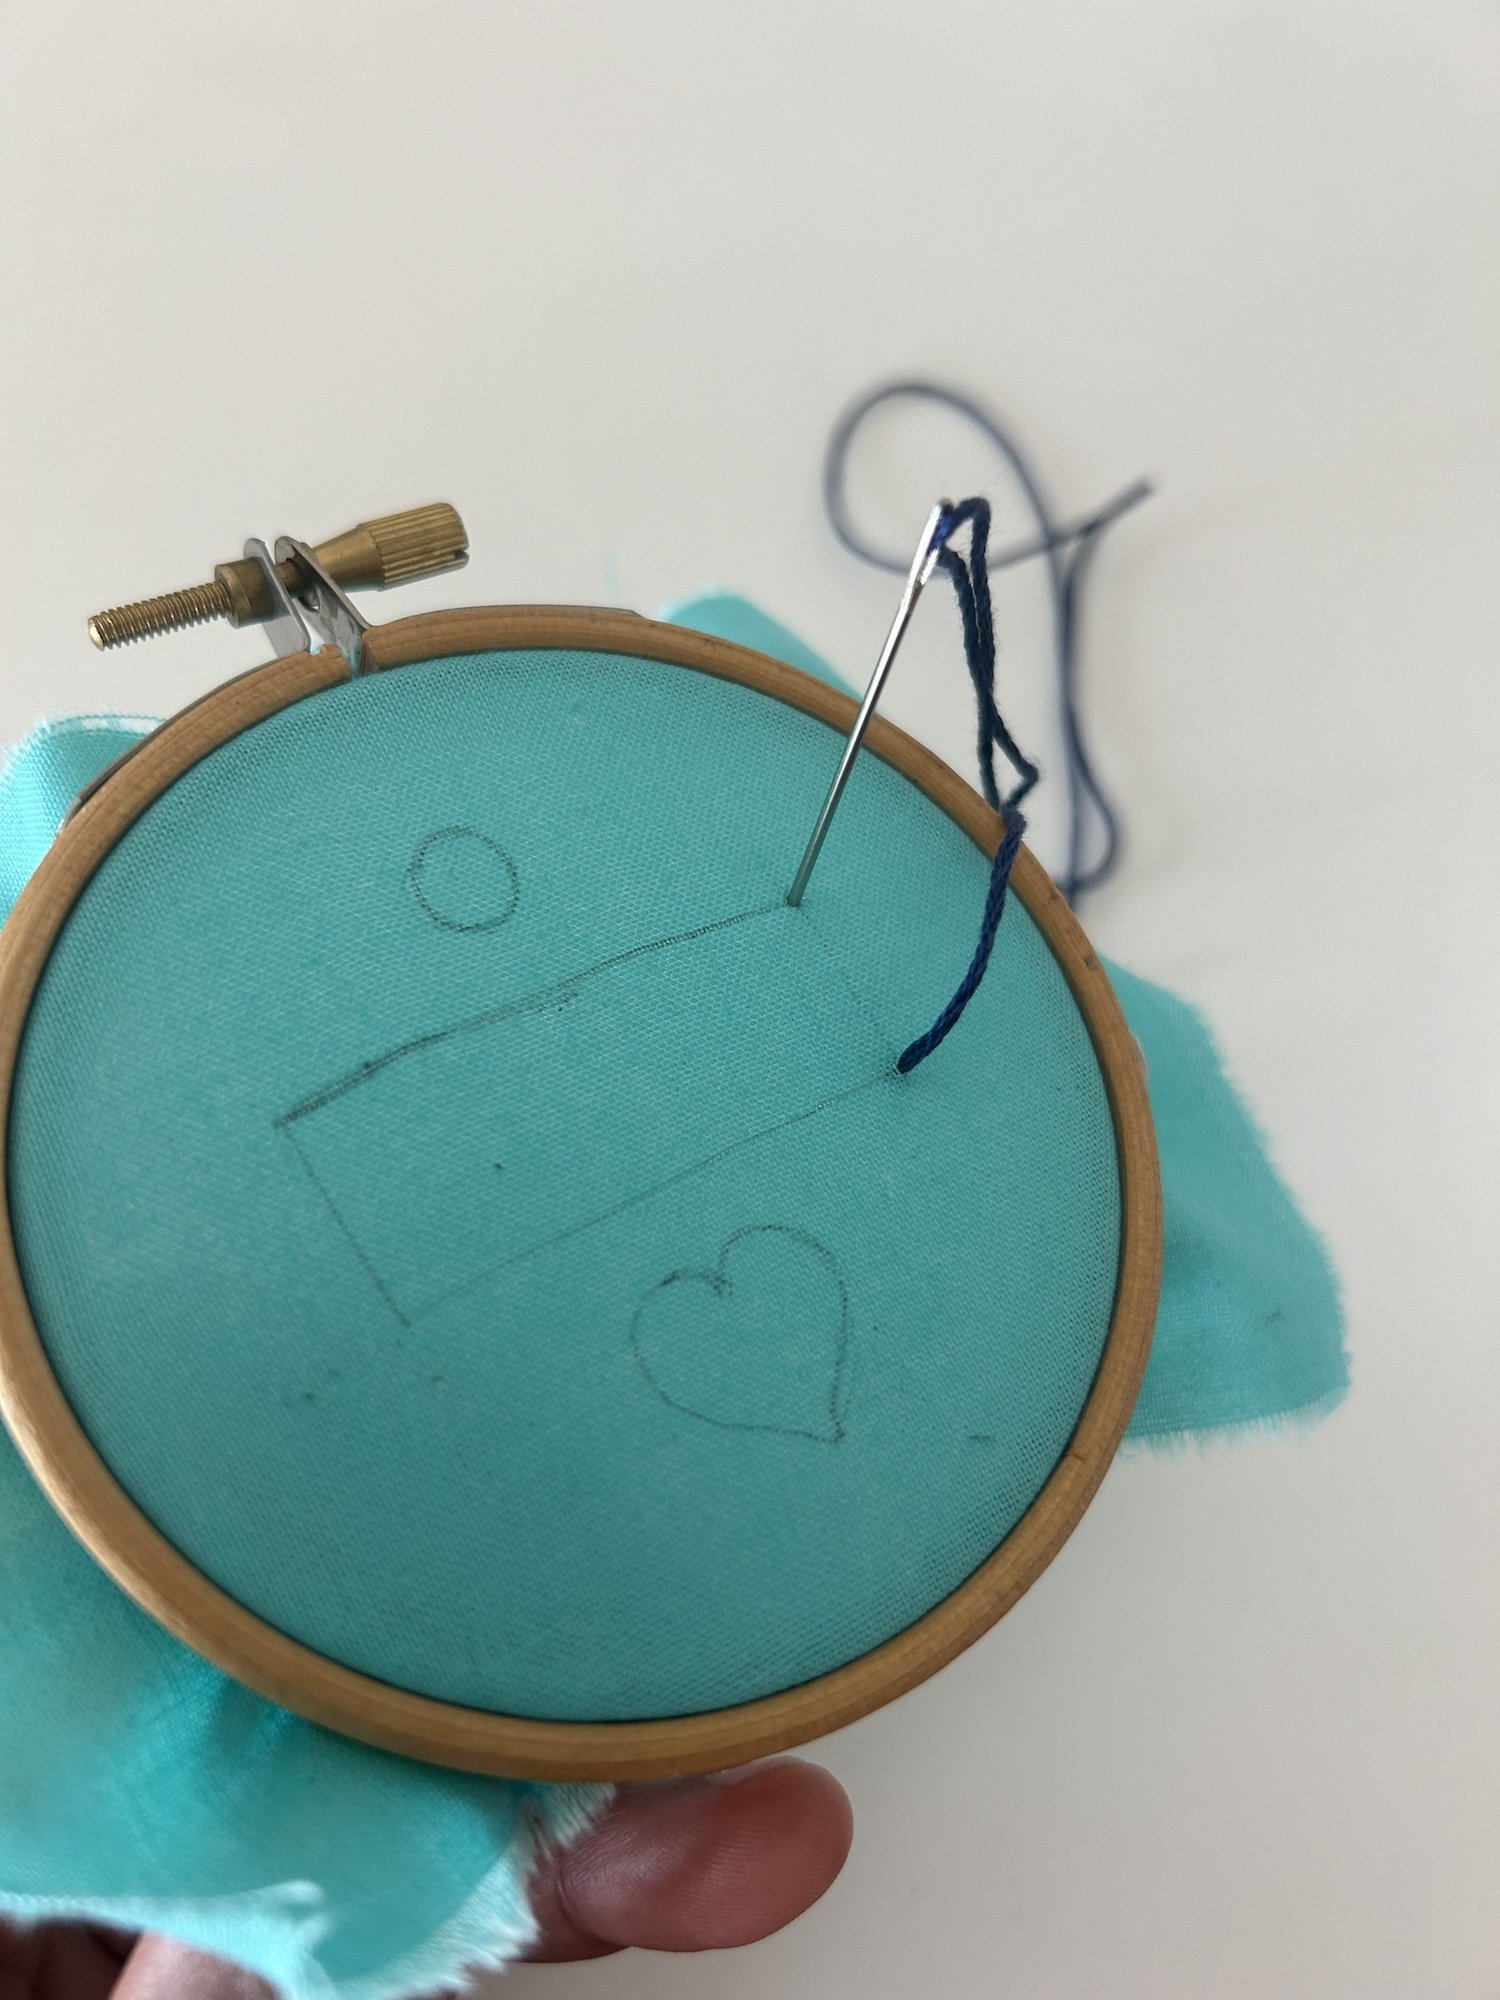
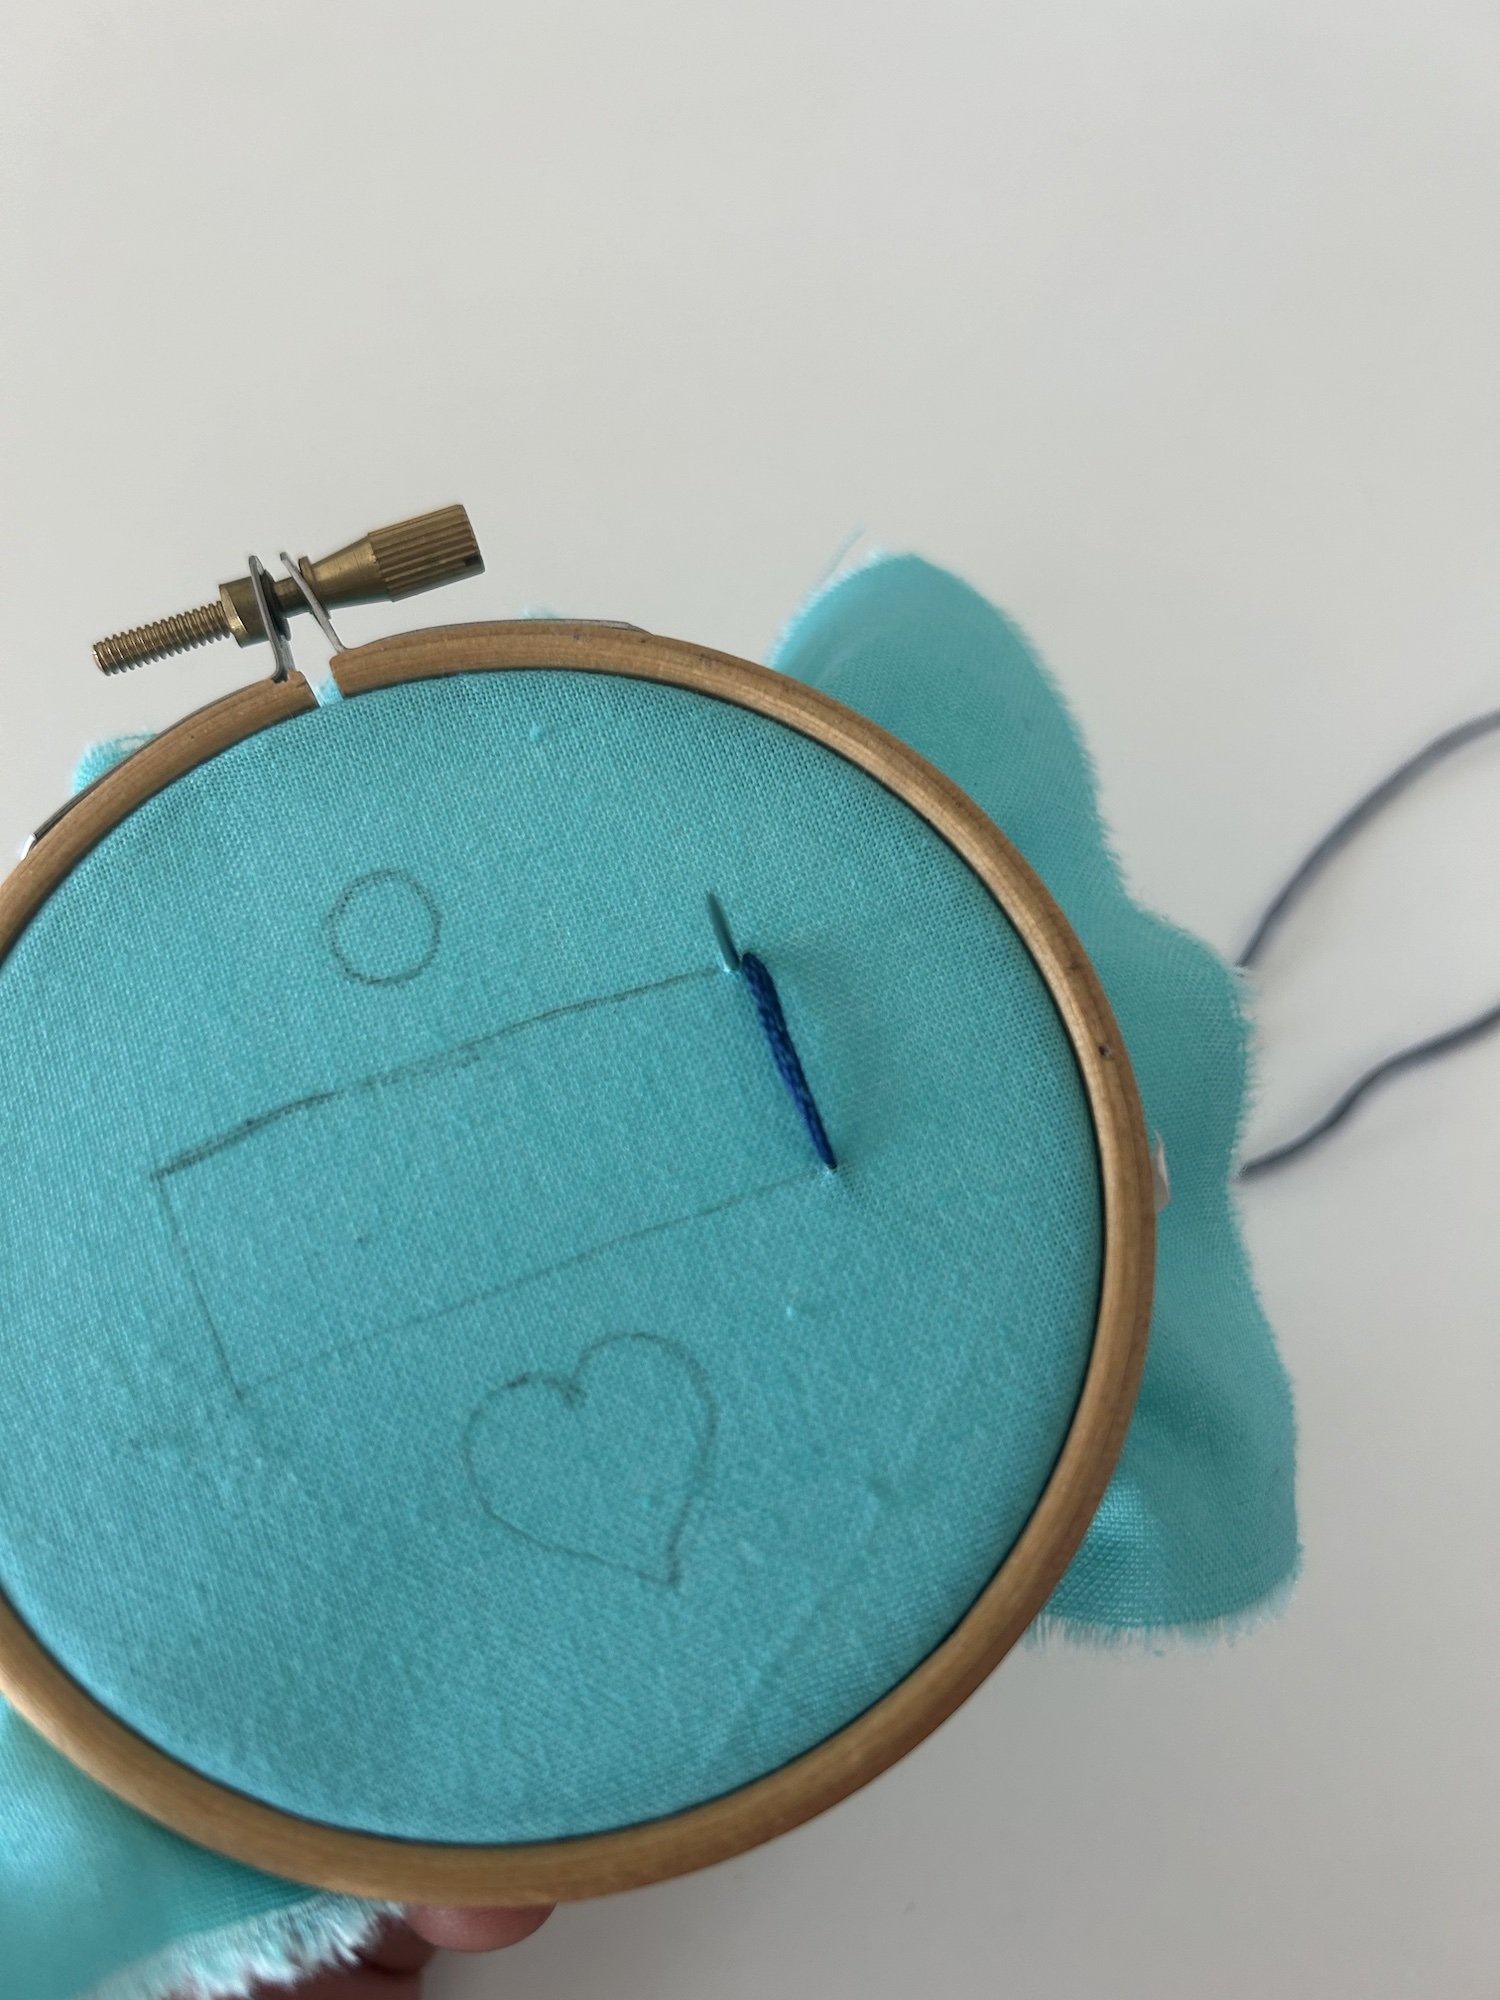
Step 4 Bring the needle up through the fabric: Starting at one edge of your shape, bring the needle up from the back of the fabric at the outline of your design.
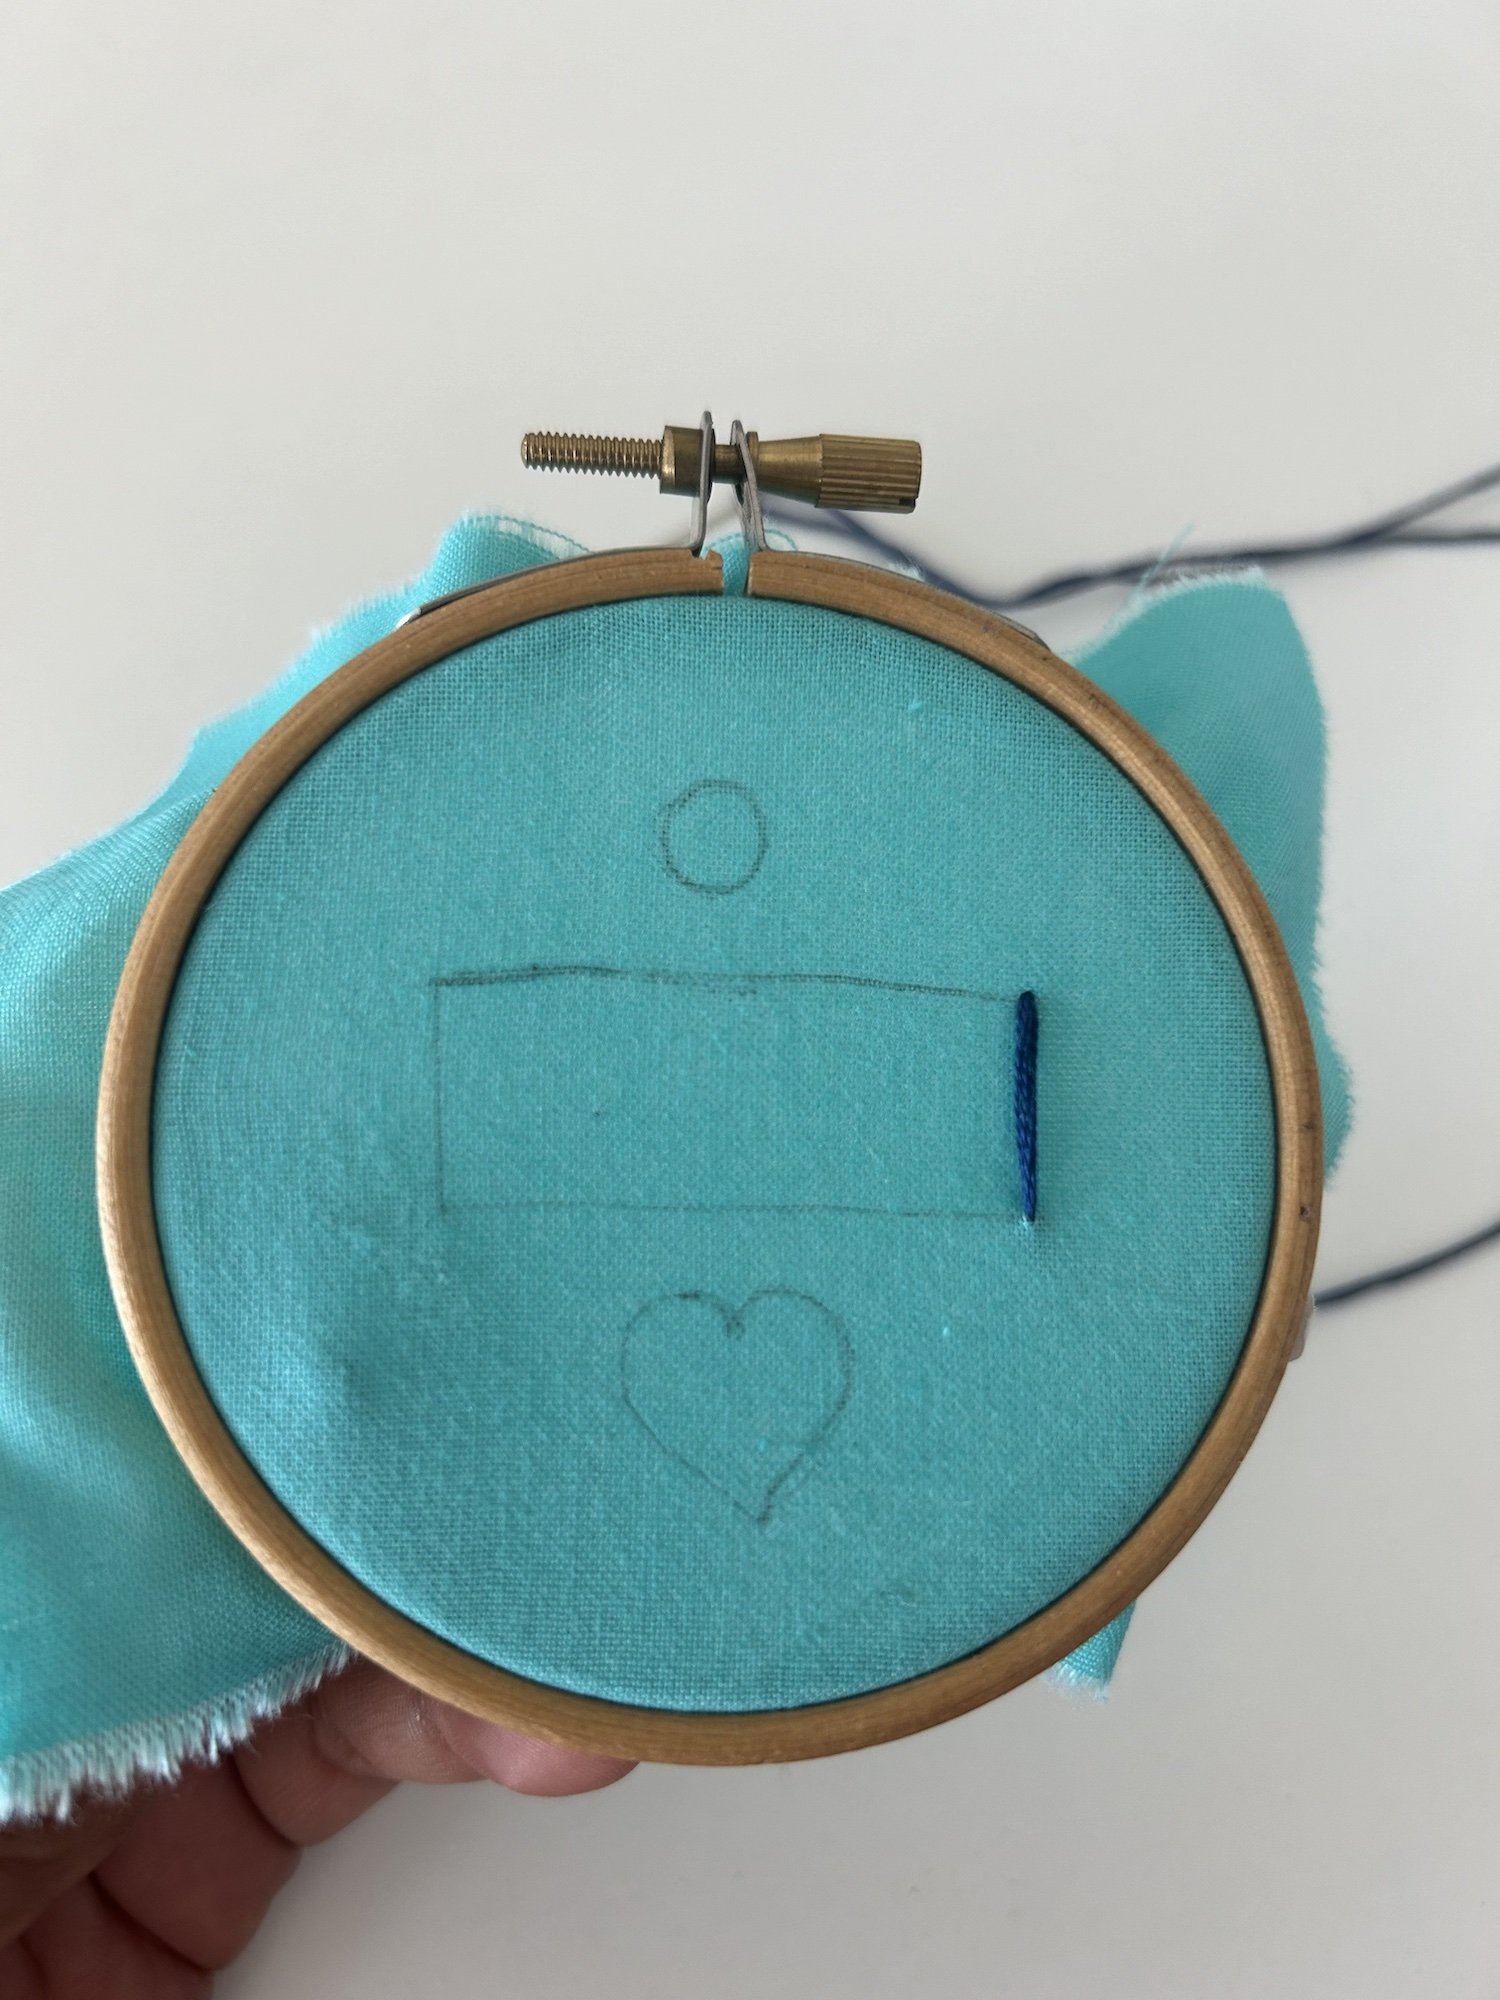
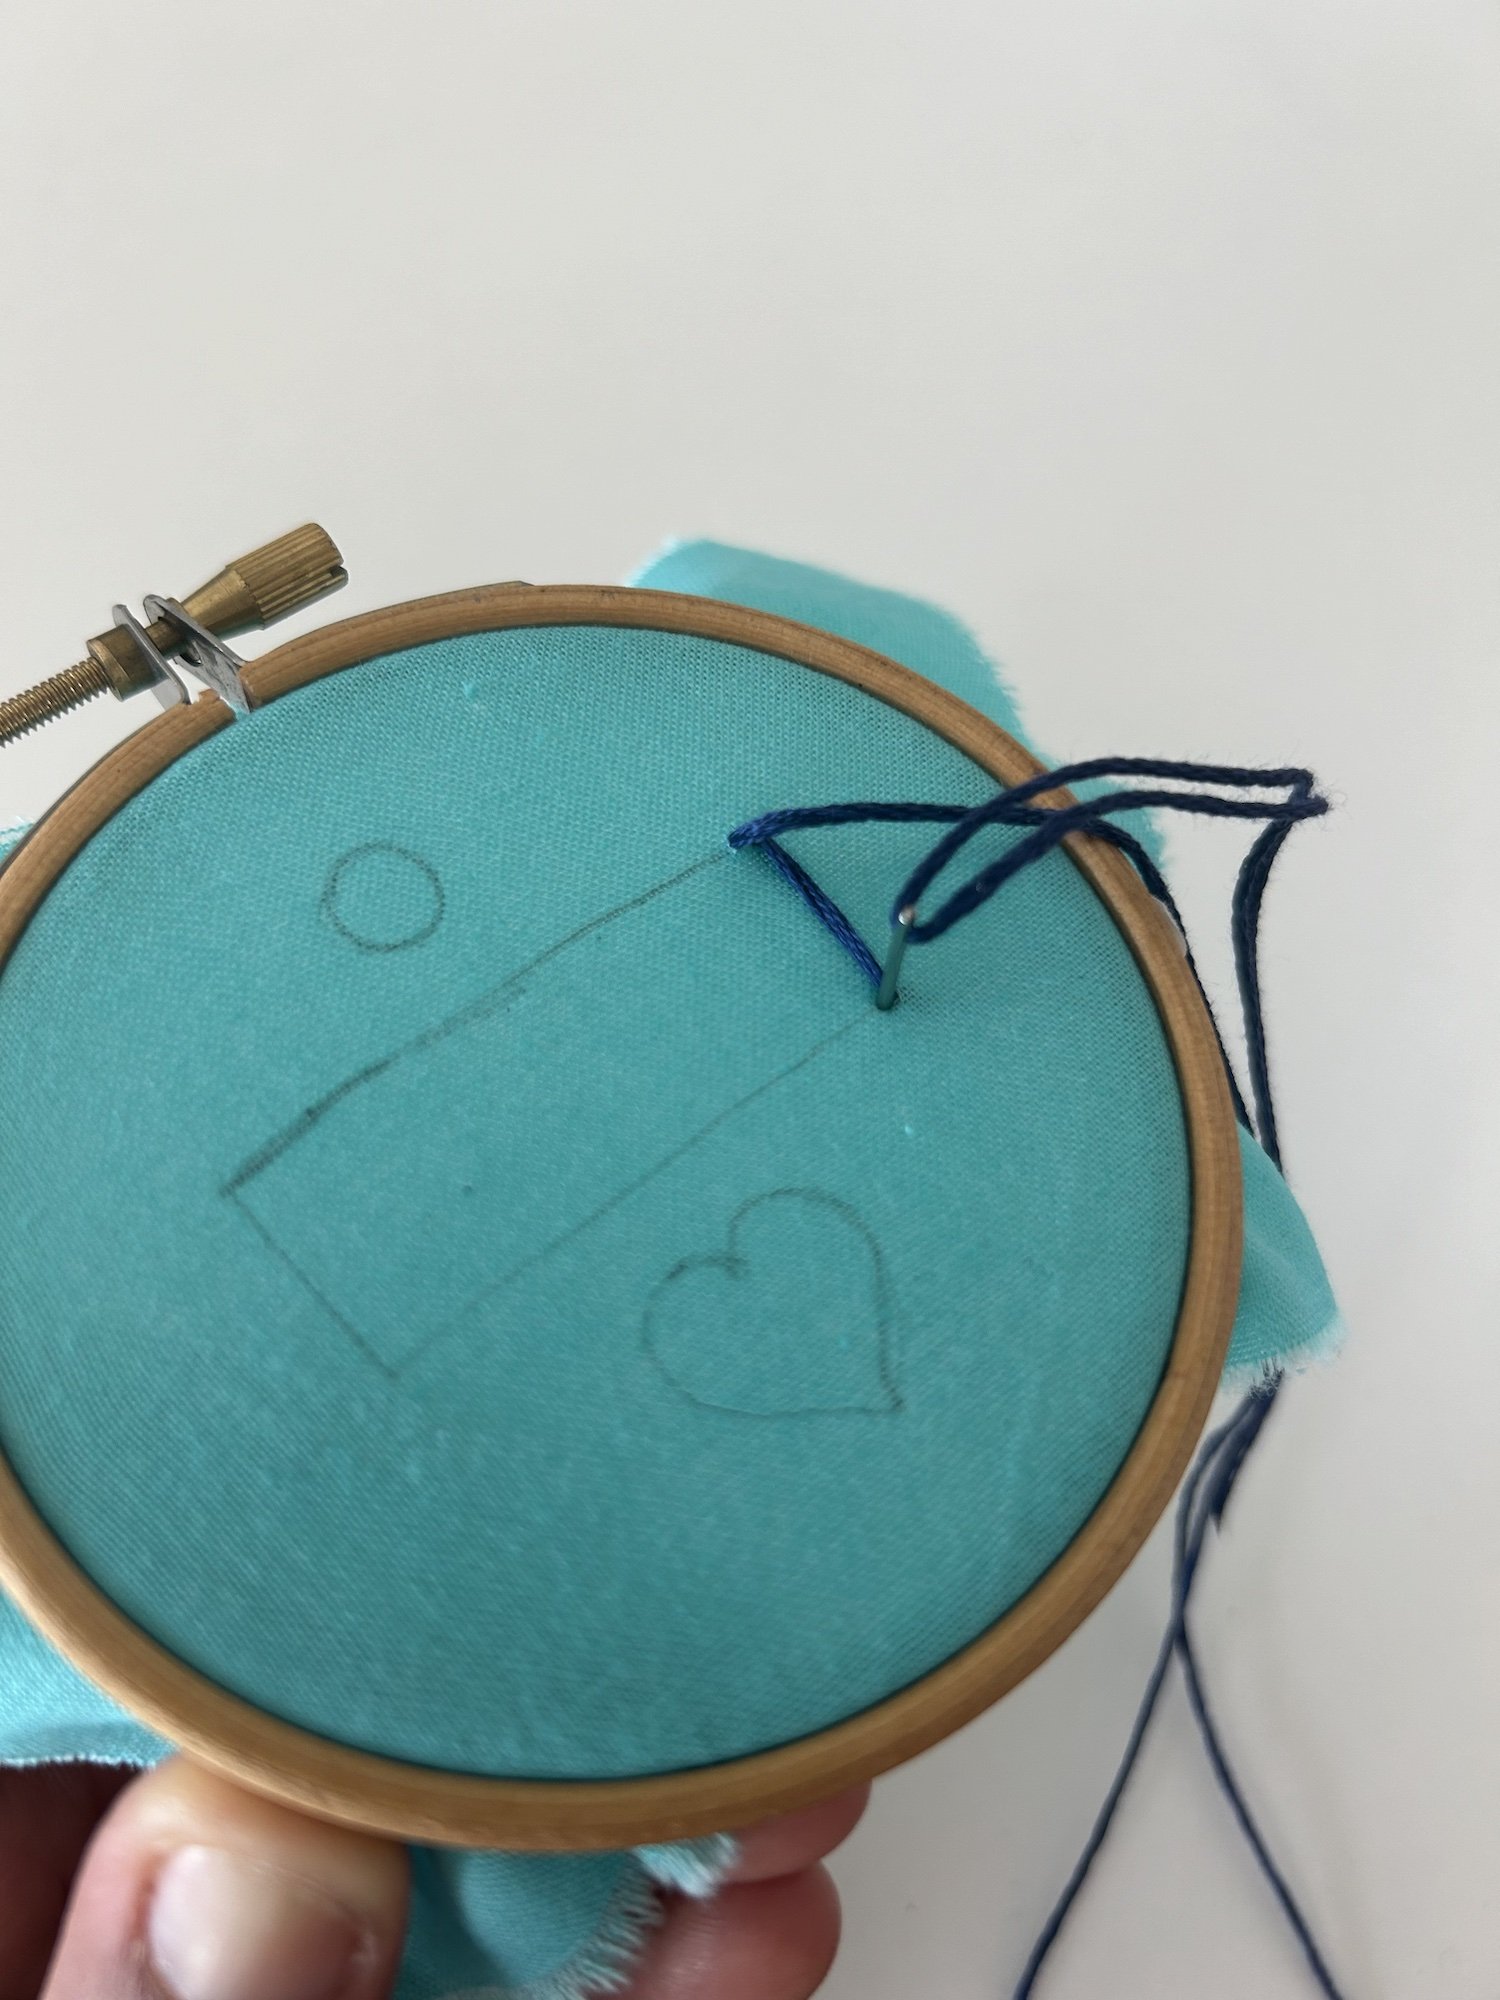
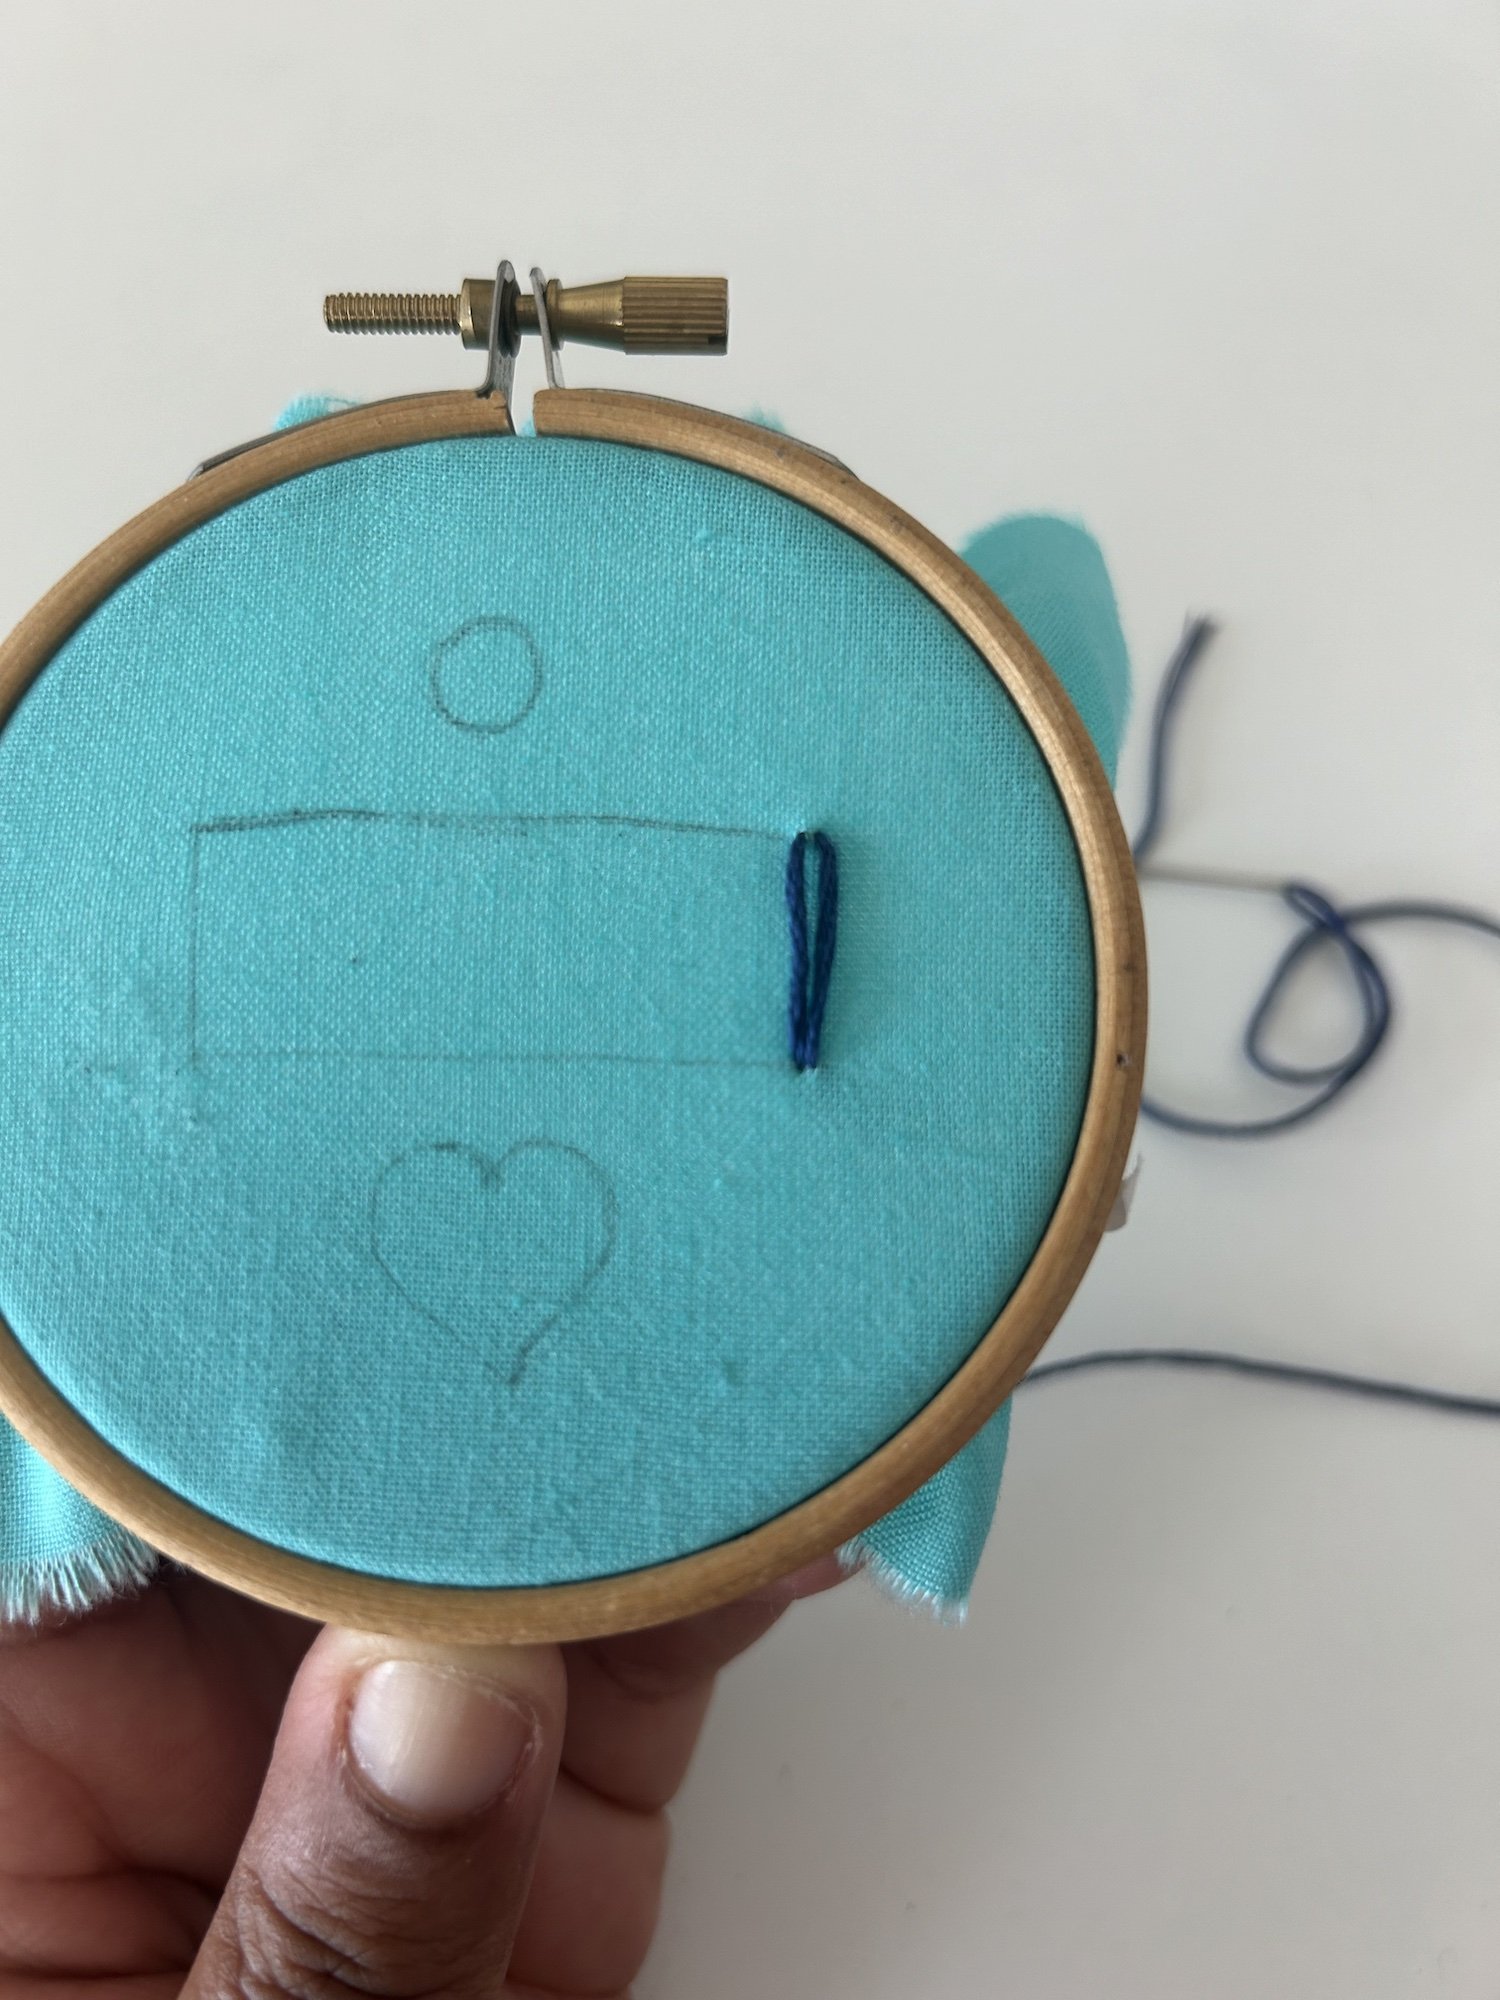
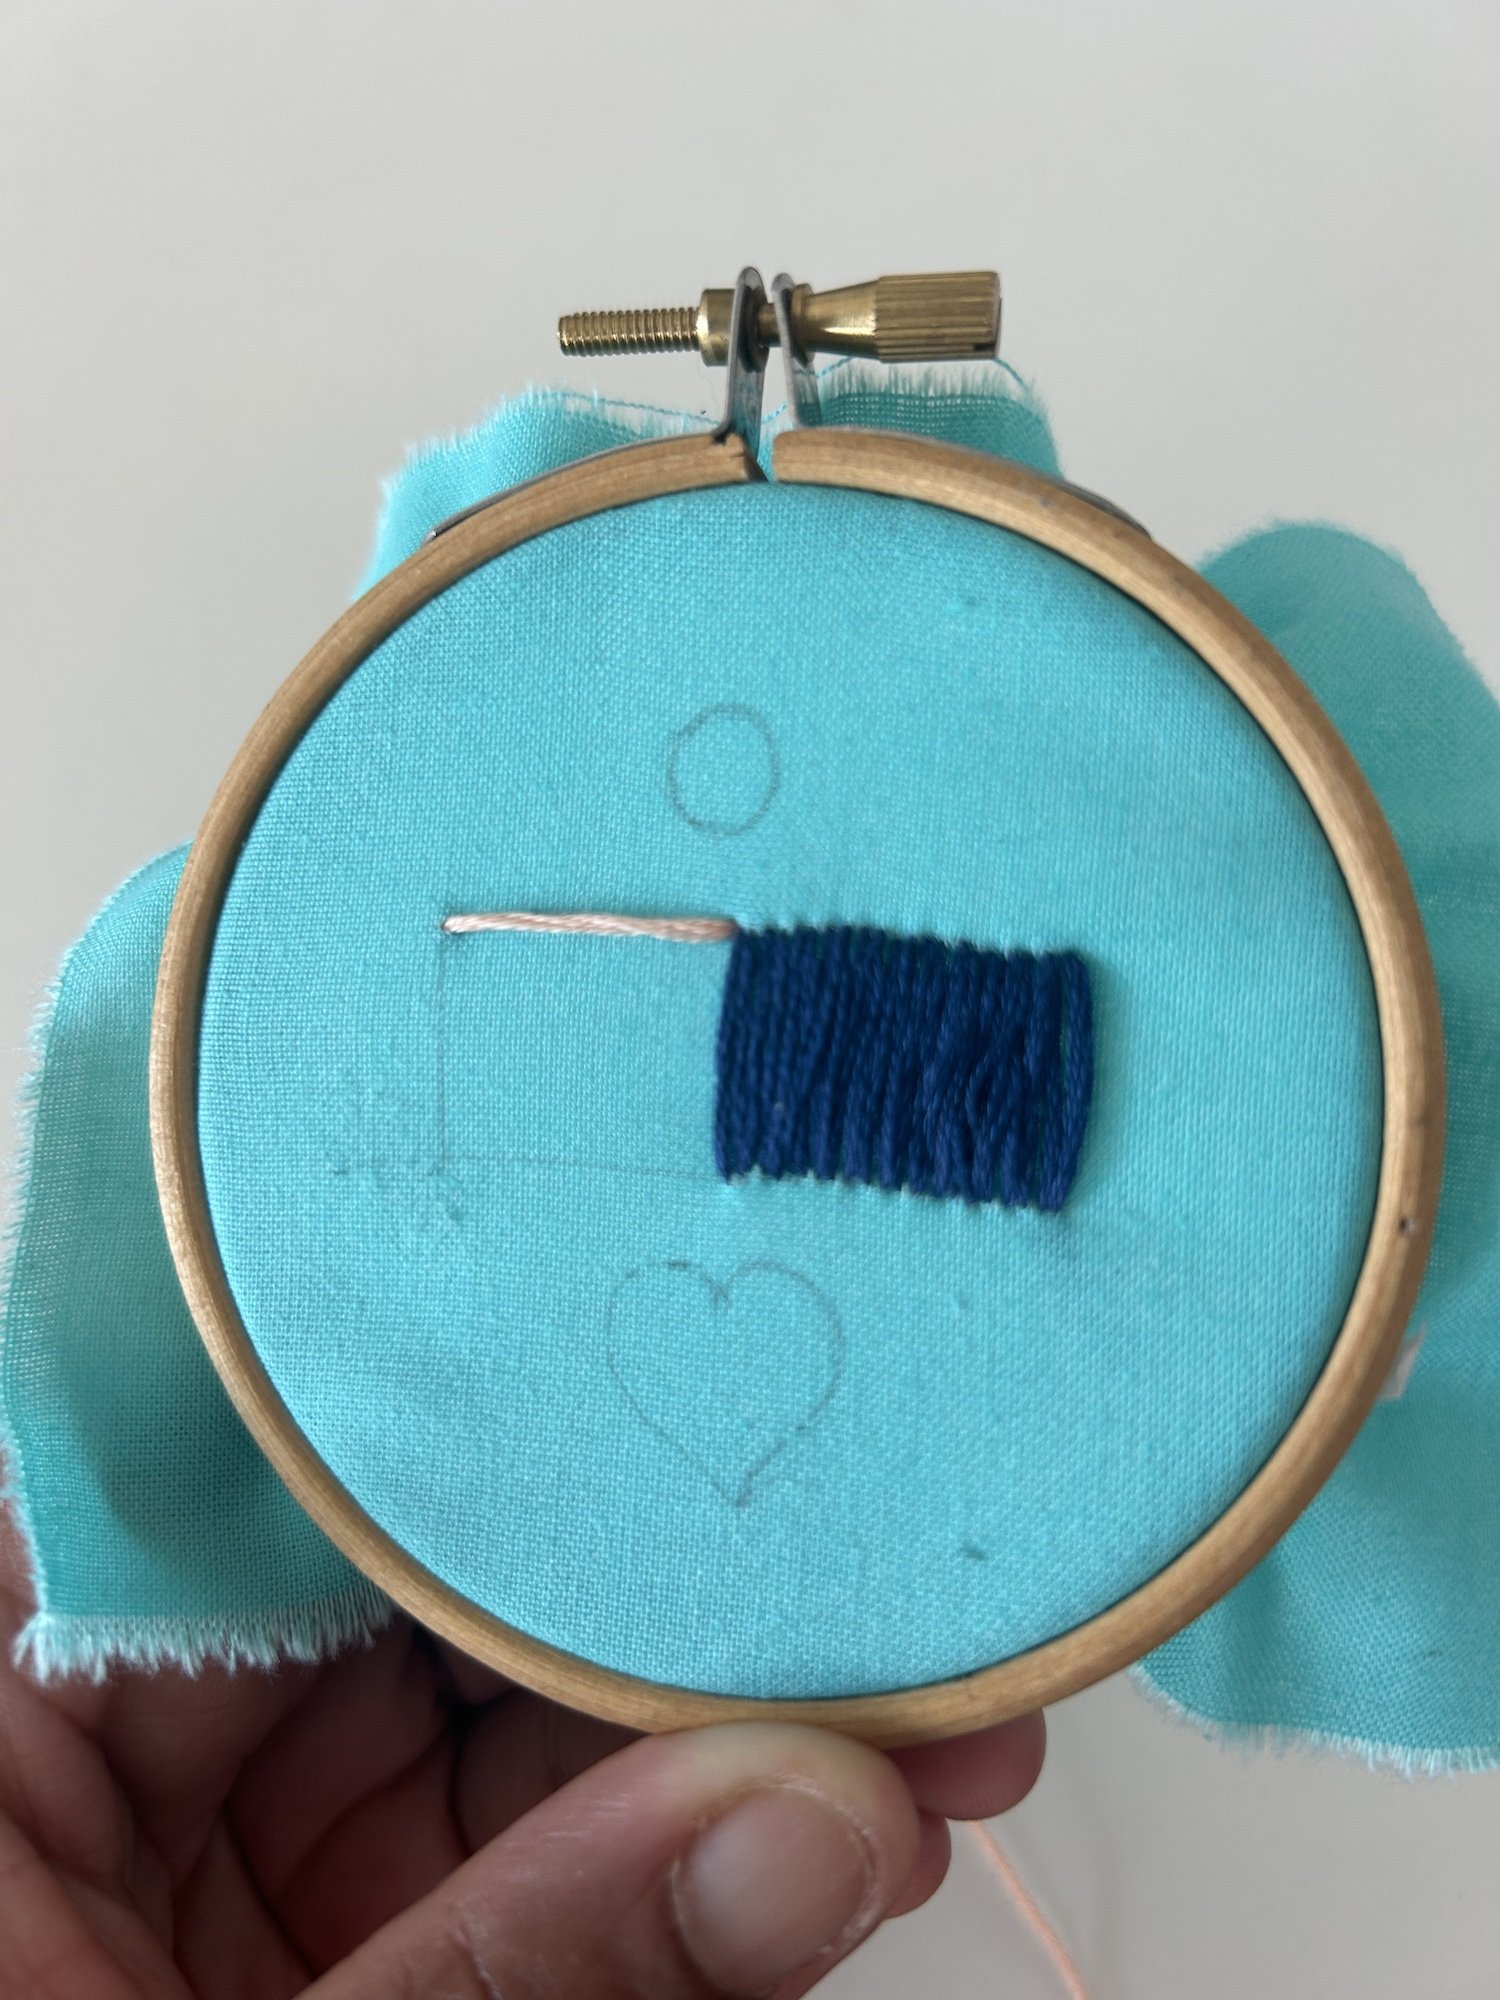
Step 5 Make your first stitch: Pull the thread all the way through and then insert the needle back into the fabric directly across from where you brought it up, on the opposite side of the shape. The thread should lie flat and smooth against the surface of the fabric.
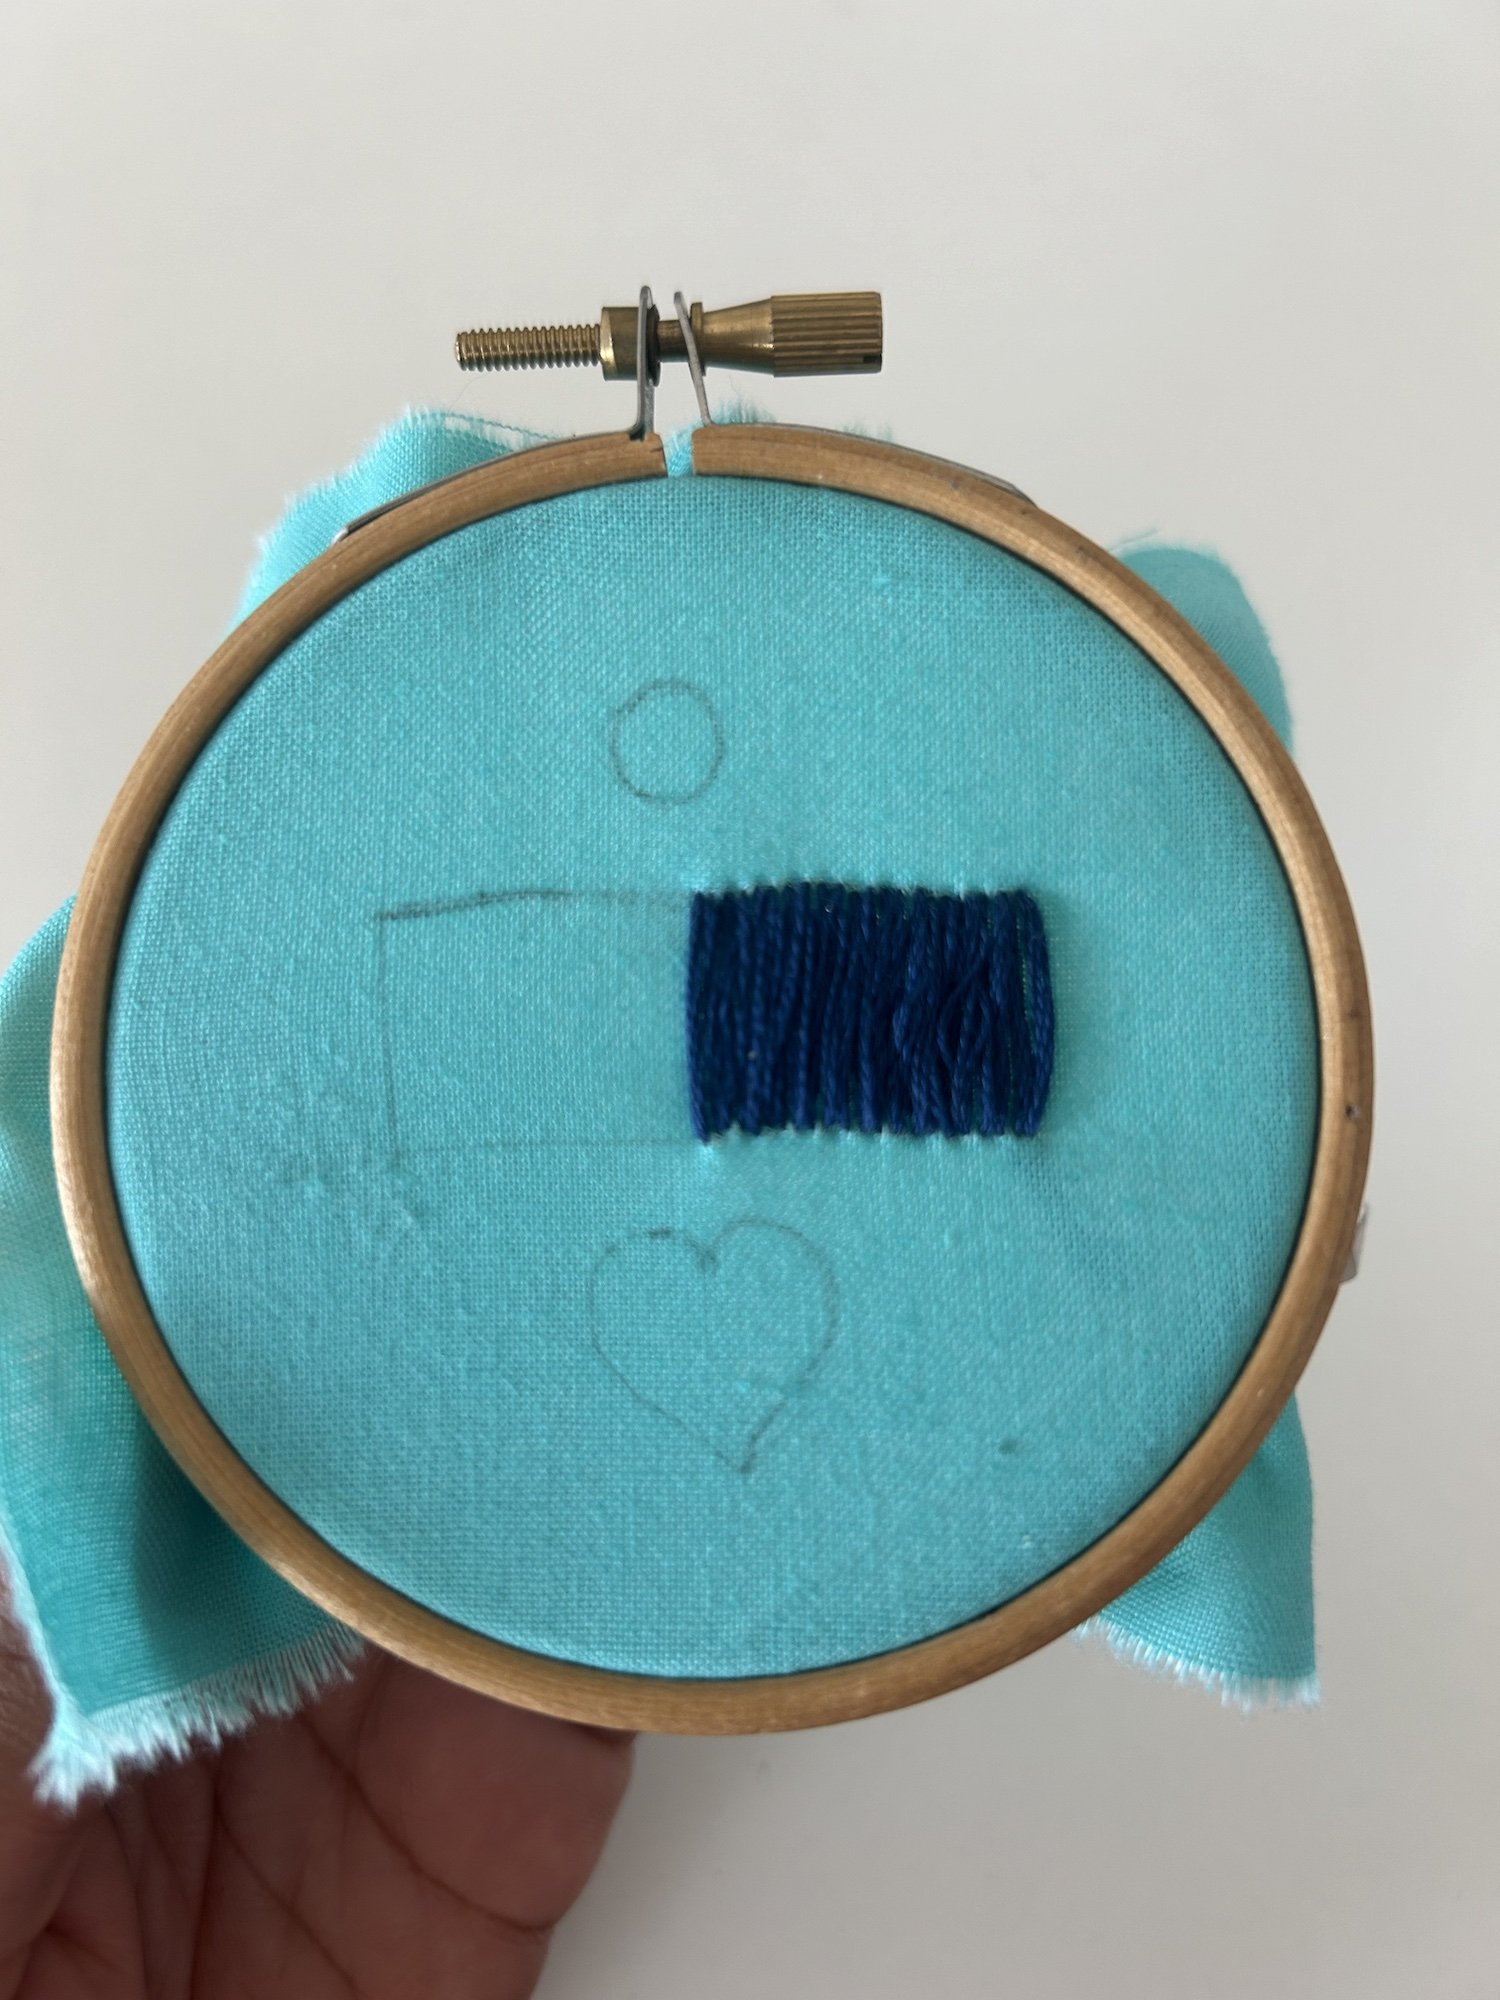
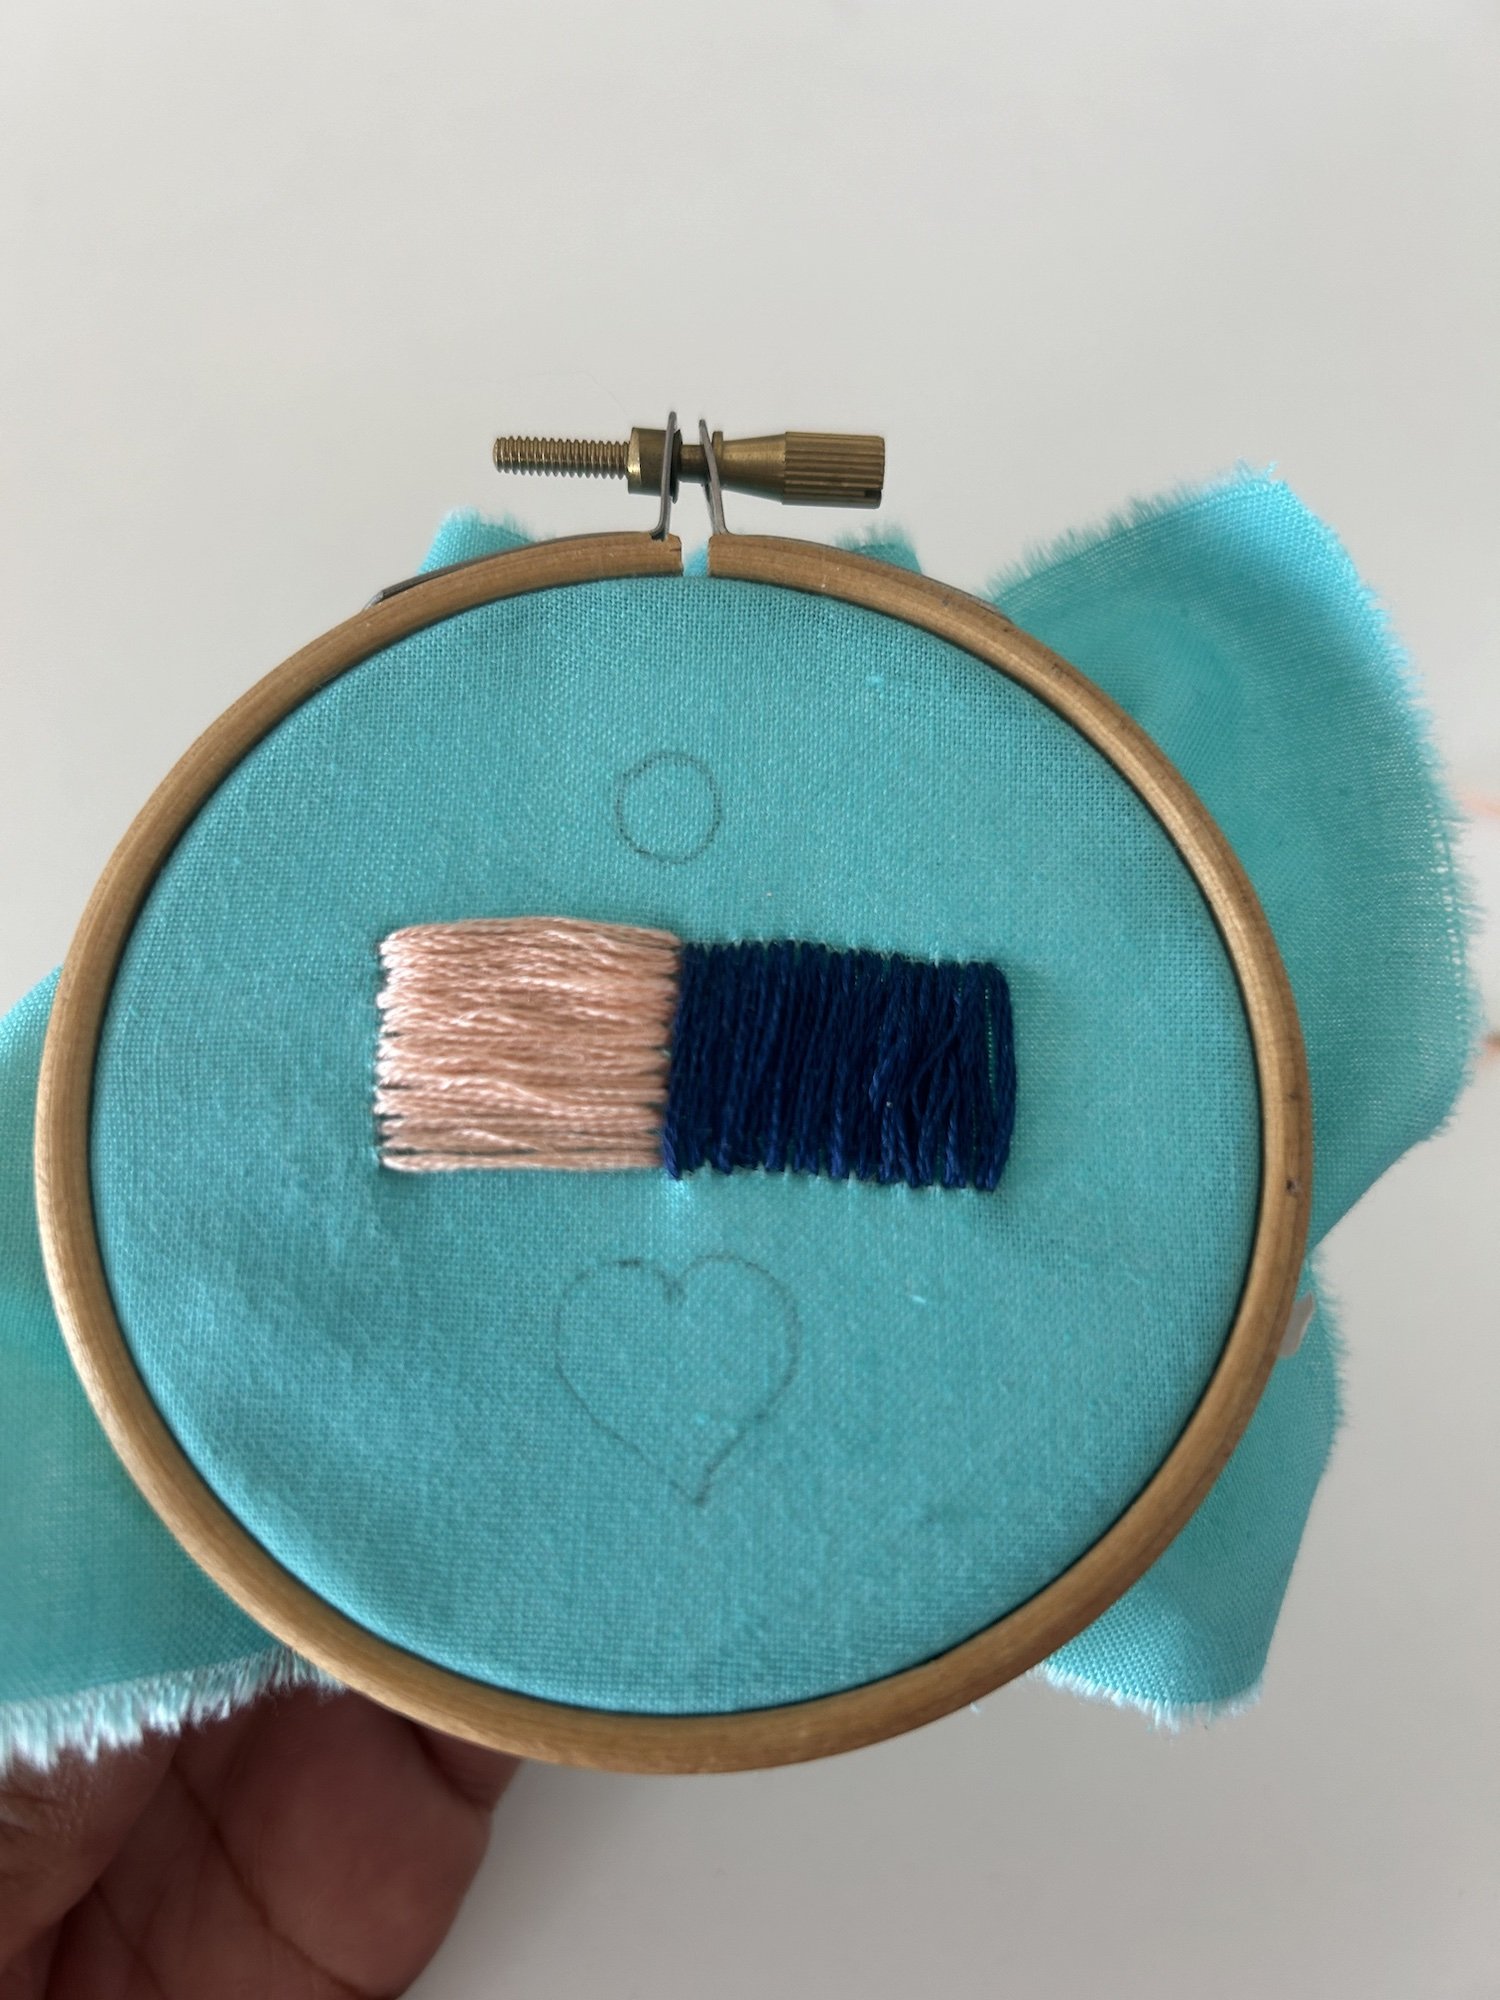
Step 6 Continue stitching: Bring the needle back up next to your first stitch, as close as possible without overlapping, and make another stitch. Continue this process, placing each stitch parallel to the last one and keeping them close together to avoid gaps between the stitches.
Step 7 Finish the shape: Continue filling in the shape with satin stitches until the entire area is covered. Take your time to ensure each stitch is smooth and even.
Step 8 Knot and trim: When you’ve completed the shape, bring the needle to the back of the fabric, tie a knot, and trim any excess thread.
Tips & Tricks
While the satin stitch is straightforward, there are a few techniques and tips that can help you achieve a flawless finish and avoid common pitfalls. Here are some useful tips for mastering this stitch:
Keep your stitches close together: The key to a successful satin stitch is ensuring that each stitch lies close to the next one, leaving no gaps between them. If there are visible gaps, the satin stitch will lose its smooth, cohesive appearance.
Work with short thread lengths: Longer lengths of thread are more prone to tangling and can lead to uneven tension in your stitches. Aim to work with thread lengths of 18-24 inches or arm’s length for better control and a smoother result.
Use an embroidery hoop: Keeping your fabric taut with an embroidery hoop helps to create even stitches and prevents the fabric from puckering, which is particularly important when filling larger areas.
Vary stitch direction for different effects: Long lengths of thread are more likely to tangle and knot, which can make your stitching uneven. Work with a manageable length of floss—around 18-24 inches is ideal.
Start with smaller areas: If you’re new to satin stitch, it’s a good idea to practice on smaller shapes or sections before moving on to larger areas. This allows you to focus on perfecting your technique without becoming overwhelmed.
Split the area into smaller sections: For larger areas, dividing the shape into smaller, more manageable sections can help you maintain control and ensure the stitches remain even. You can lightly draw lines or divide the shape in half and work on one section at a time.
Mind the tension: Pull the thread tight enough to lie flat against the fabric but not so tight that it distorts the shape or pulls at the fabric. Consistent tension is crucial for a smooth satin stitch.
Common Problems with Satin Stitch (and How to Fix Them)
Many common issues can be avoided or easily fixed with a few simple adjustments. Below are some common satin stitch problems and solutions:
Problem 1: Uneven Stitches
If your satin stitches appear uneven, it’s likely because the spacing between your stitches isn’t consistent. To fix this, focus on keeping your stitches close together and parallel. If necessary, use a fabric marker to lightly mark guidelines for where each stitch should start and end, helping you maintain even spacing.
Problem 2: Gaps Between Stitches
Gaps between stitches can occur when the stitches are too far apart or if the fabric is too loose. To avoid this, ensure that your stitches are placed closely together, with no fabric showing between them. Using an embroidery hoop to keep the fabric taut will also help eliminate gaps.
Problem 3: Puckering Fabric
Puckering happens when the thread is pulled too tightly or the fabric isn’t held taut enough. To prevent this, be mindful of your thread tension—pull the thread snugly but not so tightly that it distorts the fabric. Always use an embroidery hoop to keep your fabric firm and smooth.
Problem 4: Fraying or Twisting Thread
Embroidery floss can sometimes twist or fray, especially if you’re working with longer strands. To reduce twisting, periodically let your needle hang freely to untwist the thread as you stitch. If fraying becomes a problem, try using shorter lengths of floss or switching to a higher-quality thread.
History of the Satin Stitch
The satin stitch has been a fundamental technique in embroidery for centuries, appearing in textiles across numerous cultures and historical periods. Early examples of satin stitch can be found in ancient Egyptian and Chinese embroidery, where the stitch was used to create intricate designs on clothing, wall hangings, and ceremonial textiles.
In China, the satin stitch was particularly prevalent in silk embroidery, where it was used to create lifelike designs of flowers, birds, and landscapes on fine silk fabrics. The smooth, glossy quality of the stitch complemented the luxurious texture of the silk threads, resulting in stunningly detailed and intricate artwork.
During the Renaissance in Europe, the satin stitch became a favored technique in ecclesiastical and courtly embroidery, where it was often used to fill in areas of elaborate patterns and motifs. The stitch’s ability to create a sleek, shiny surface made it popular in goldwork, where metallic threads were used to add opulence to religious garments and royal attire.
Today, the satin stitch remains a staple in embroidery, used in both traditional and contemporary designs. Its adaptability and aesthetic appeal have made it a favorite among embroiderers, from hobbyists to professional textile artists.
Ways To Use Satin Stitch
The satin stitch is incredibly versatile and can be used in a wide variety of embroidery projects, from small embellishments to larger, more intricate designs. Here are some creative ways to incorporate satin stitch into your embroidery work:
Floral Embroidery
Satin stitch is perfect for filling in flower petals and leaves, giving your floral designs a smooth, vibrant appearance. The stitch’s glossy finish reflects light, adding depth and dimension to your floral motifs. For example, you can use satin stitch to create roses, daisies, or other flowers, with each petal filled in using the stitch to create a polished, lifelike effect.
To add more interest to your floral designs, vary the direction of your satin stitches for different petals. This technique creates a natural, realistic appearance, as petals in real life are rarely uniform.
Lettering and Monograms
Satin stitch is a popular choice for embroidering monograms and letters, thanks to its ability to create bold, clean lines with a glossy finish. Whether you're embellishing a towel, napkin, or piece of clothing, satin stitch gives your lettering a professional, elegant look.
For best results, use satin stitch on larger letters, where there’s enough space to lay the stitches smoothly without crowding. If you’re working with smaller, more intricate letters, consider using a backstitch or split stitch for cleaner lines.
Animal Embroidery
Satin stitch is ideal for adding smooth, polished areas of color to animal embroidery designs. For instance, satin stitch can be used to fill in the fur, feathers, or skin of an embroidered animal, giving it a sleek, lifelike texture. You can combine satin stitch with other stitches like French knots or split stitch to add texture and detail to your design.
For a more realistic effect, use different shades of thread to create highlights and shadows within your satin stitches. This technique adds dimension and depth to the design, making it appear more three-dimensional.
3D Embroidery
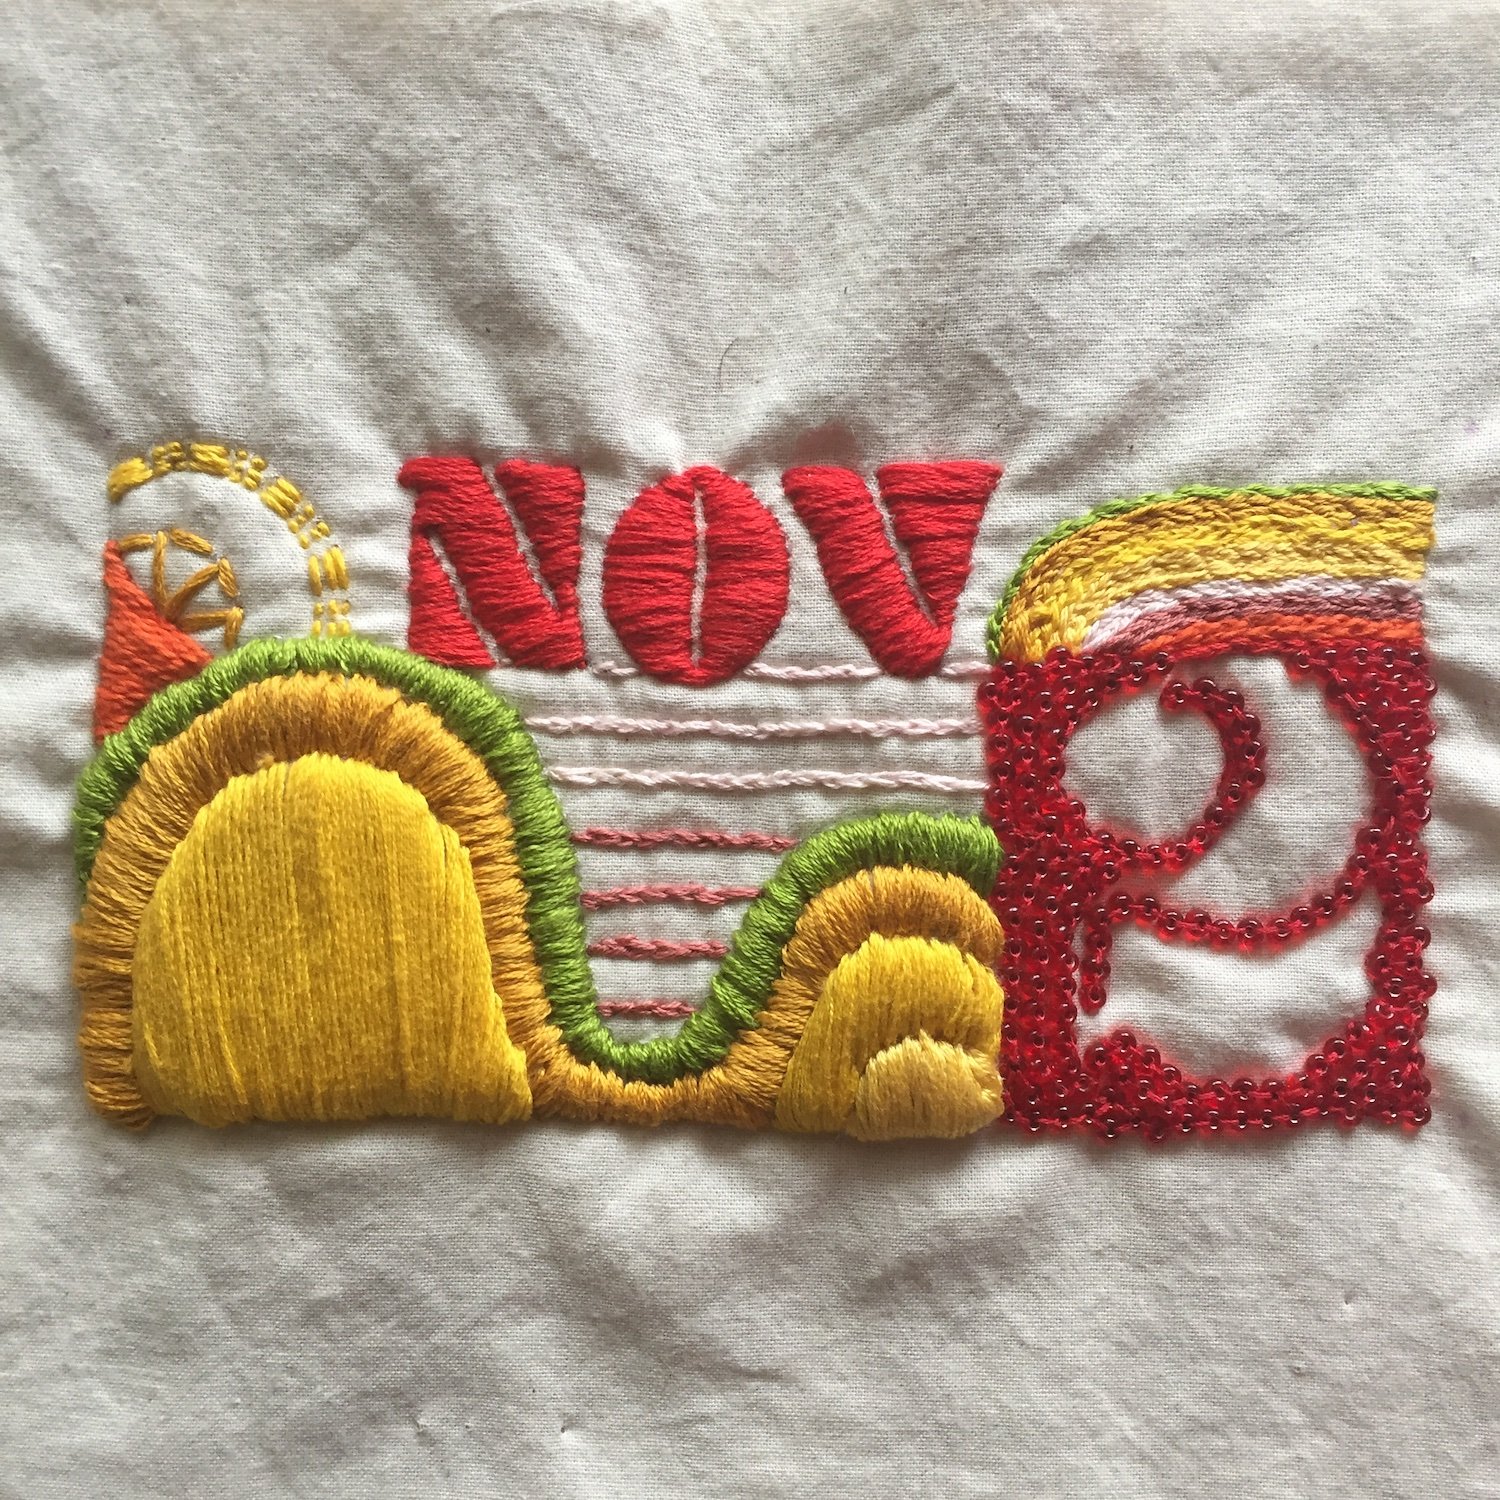
If you want your satin stitch to have a more raised, dimensional appearance, you can pad the area by laying down a few stitches or a layer of felt before beginning the satin stitch. This technique is often used in goldwork and more elaborate embroidery designs.
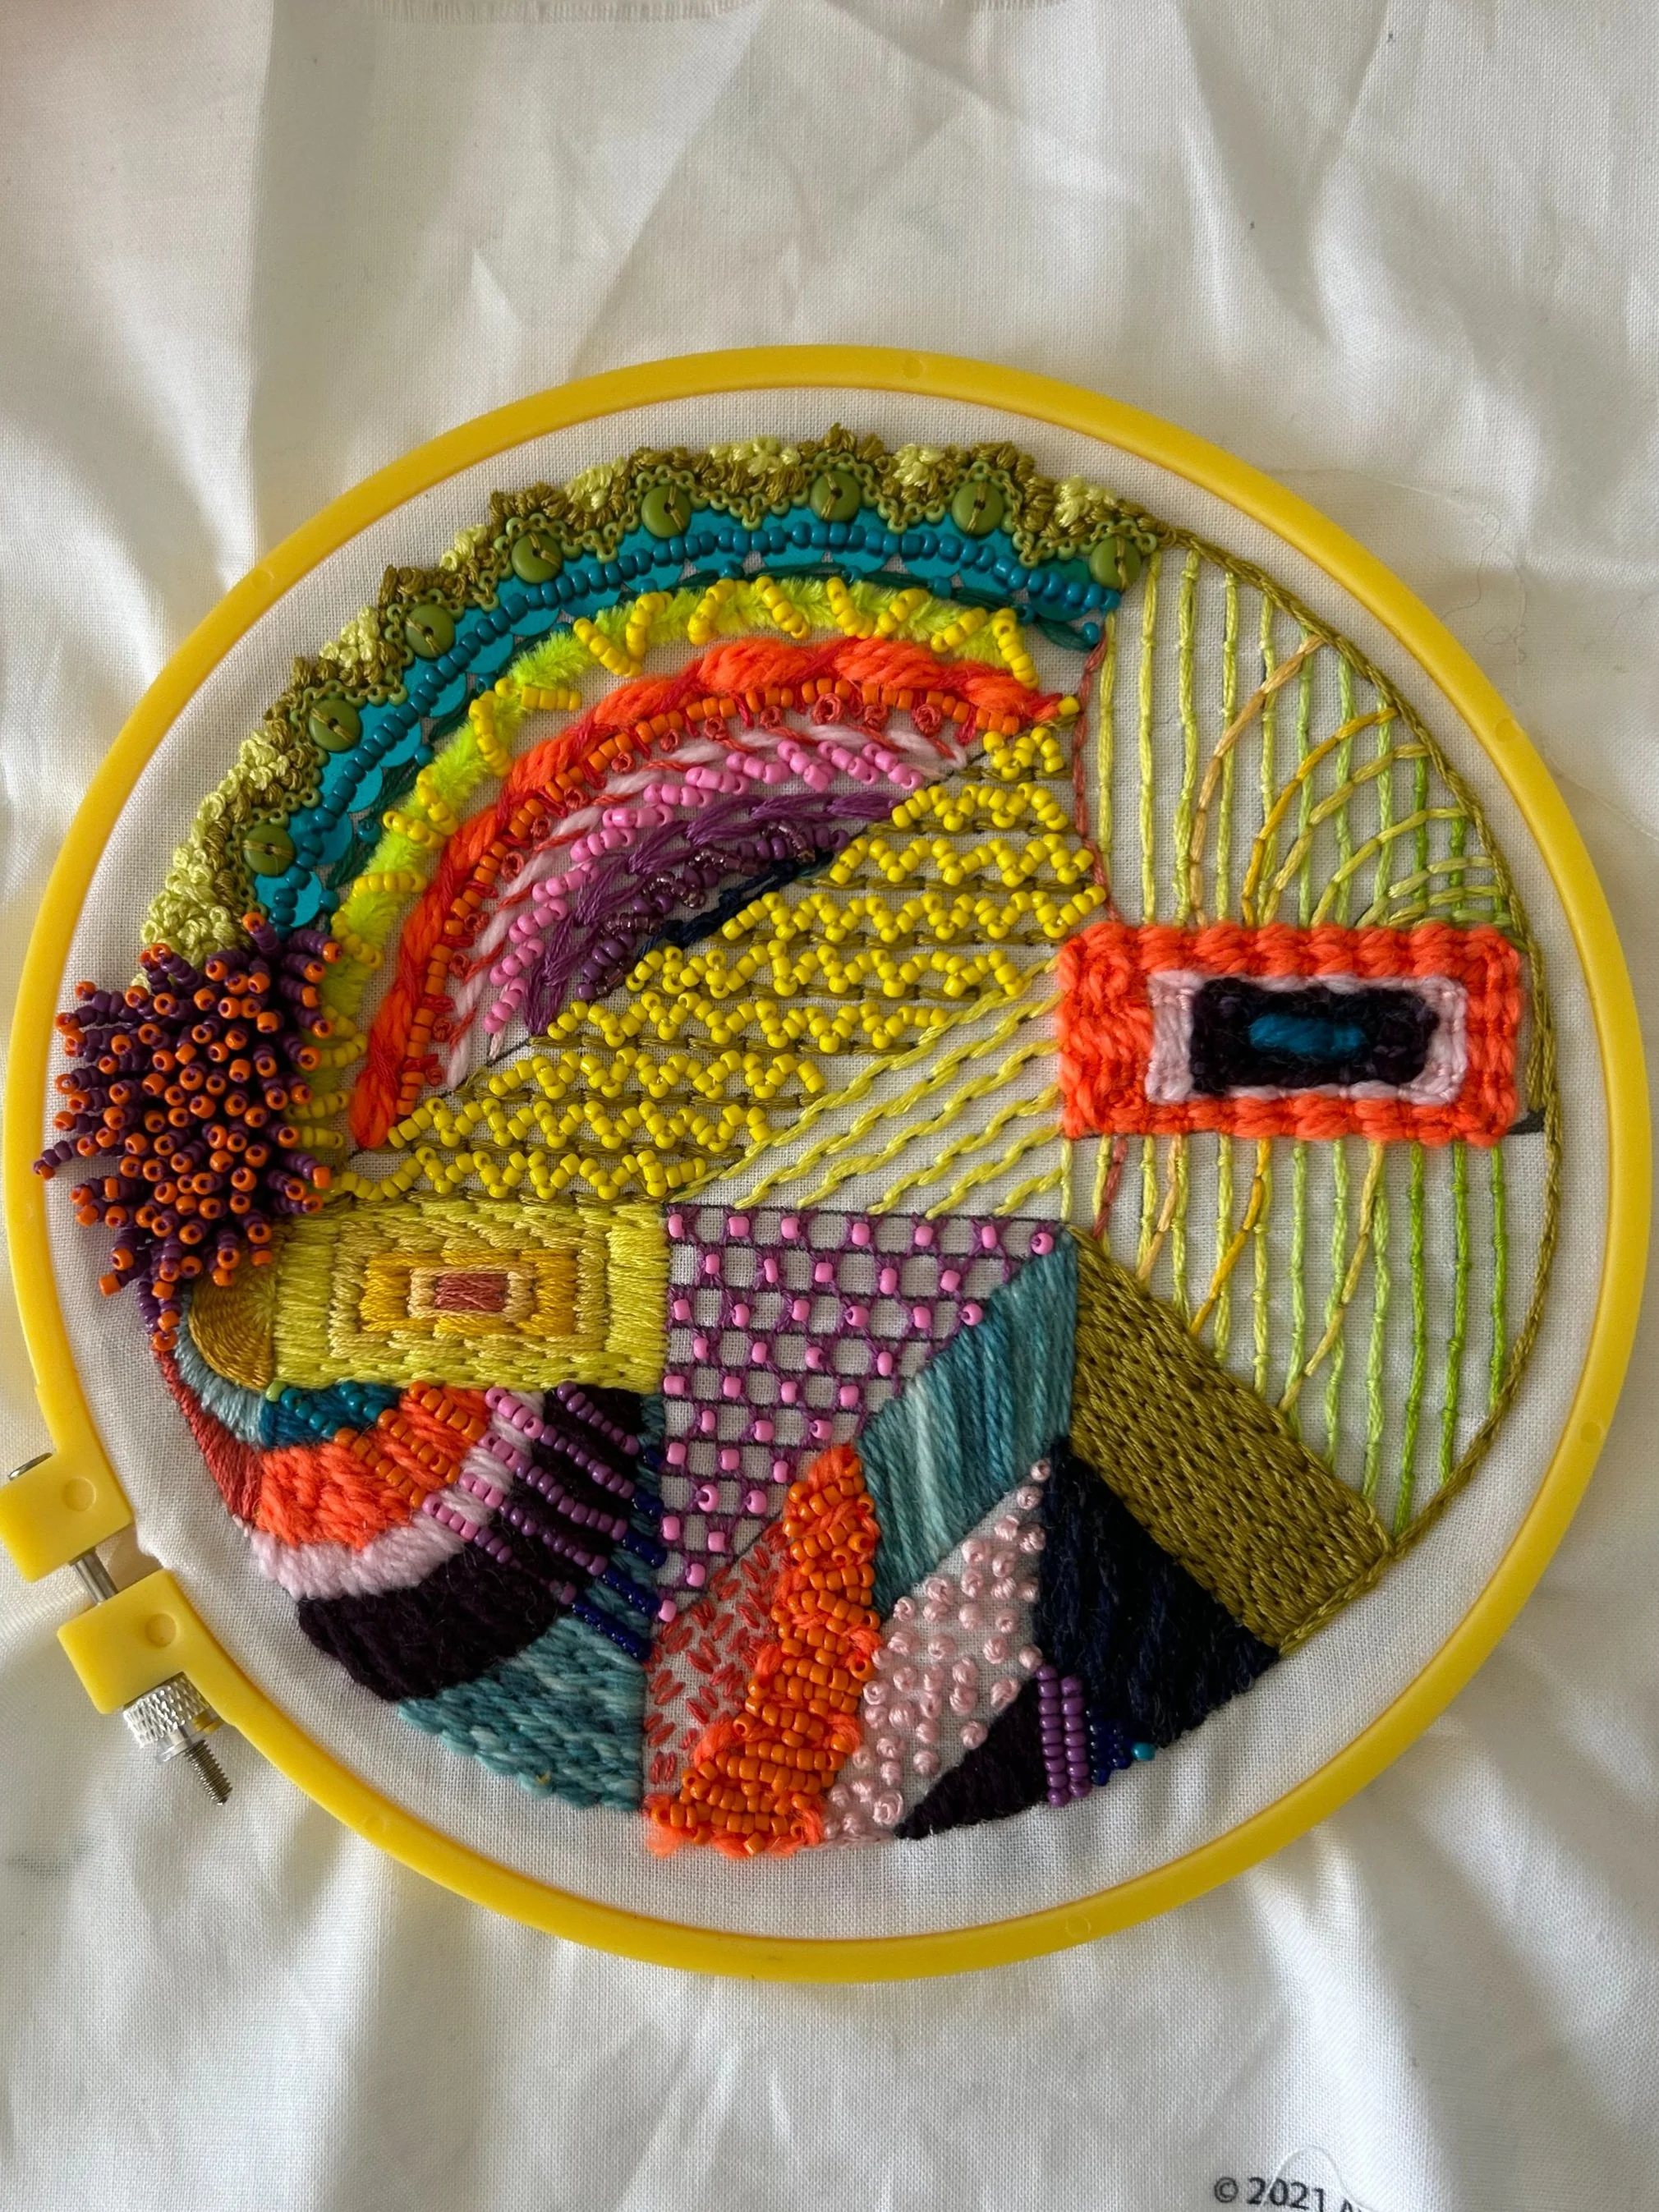
Padded satin stitch embroidery with chainstitch, running stitch and beadwork.
Geometric Patterns
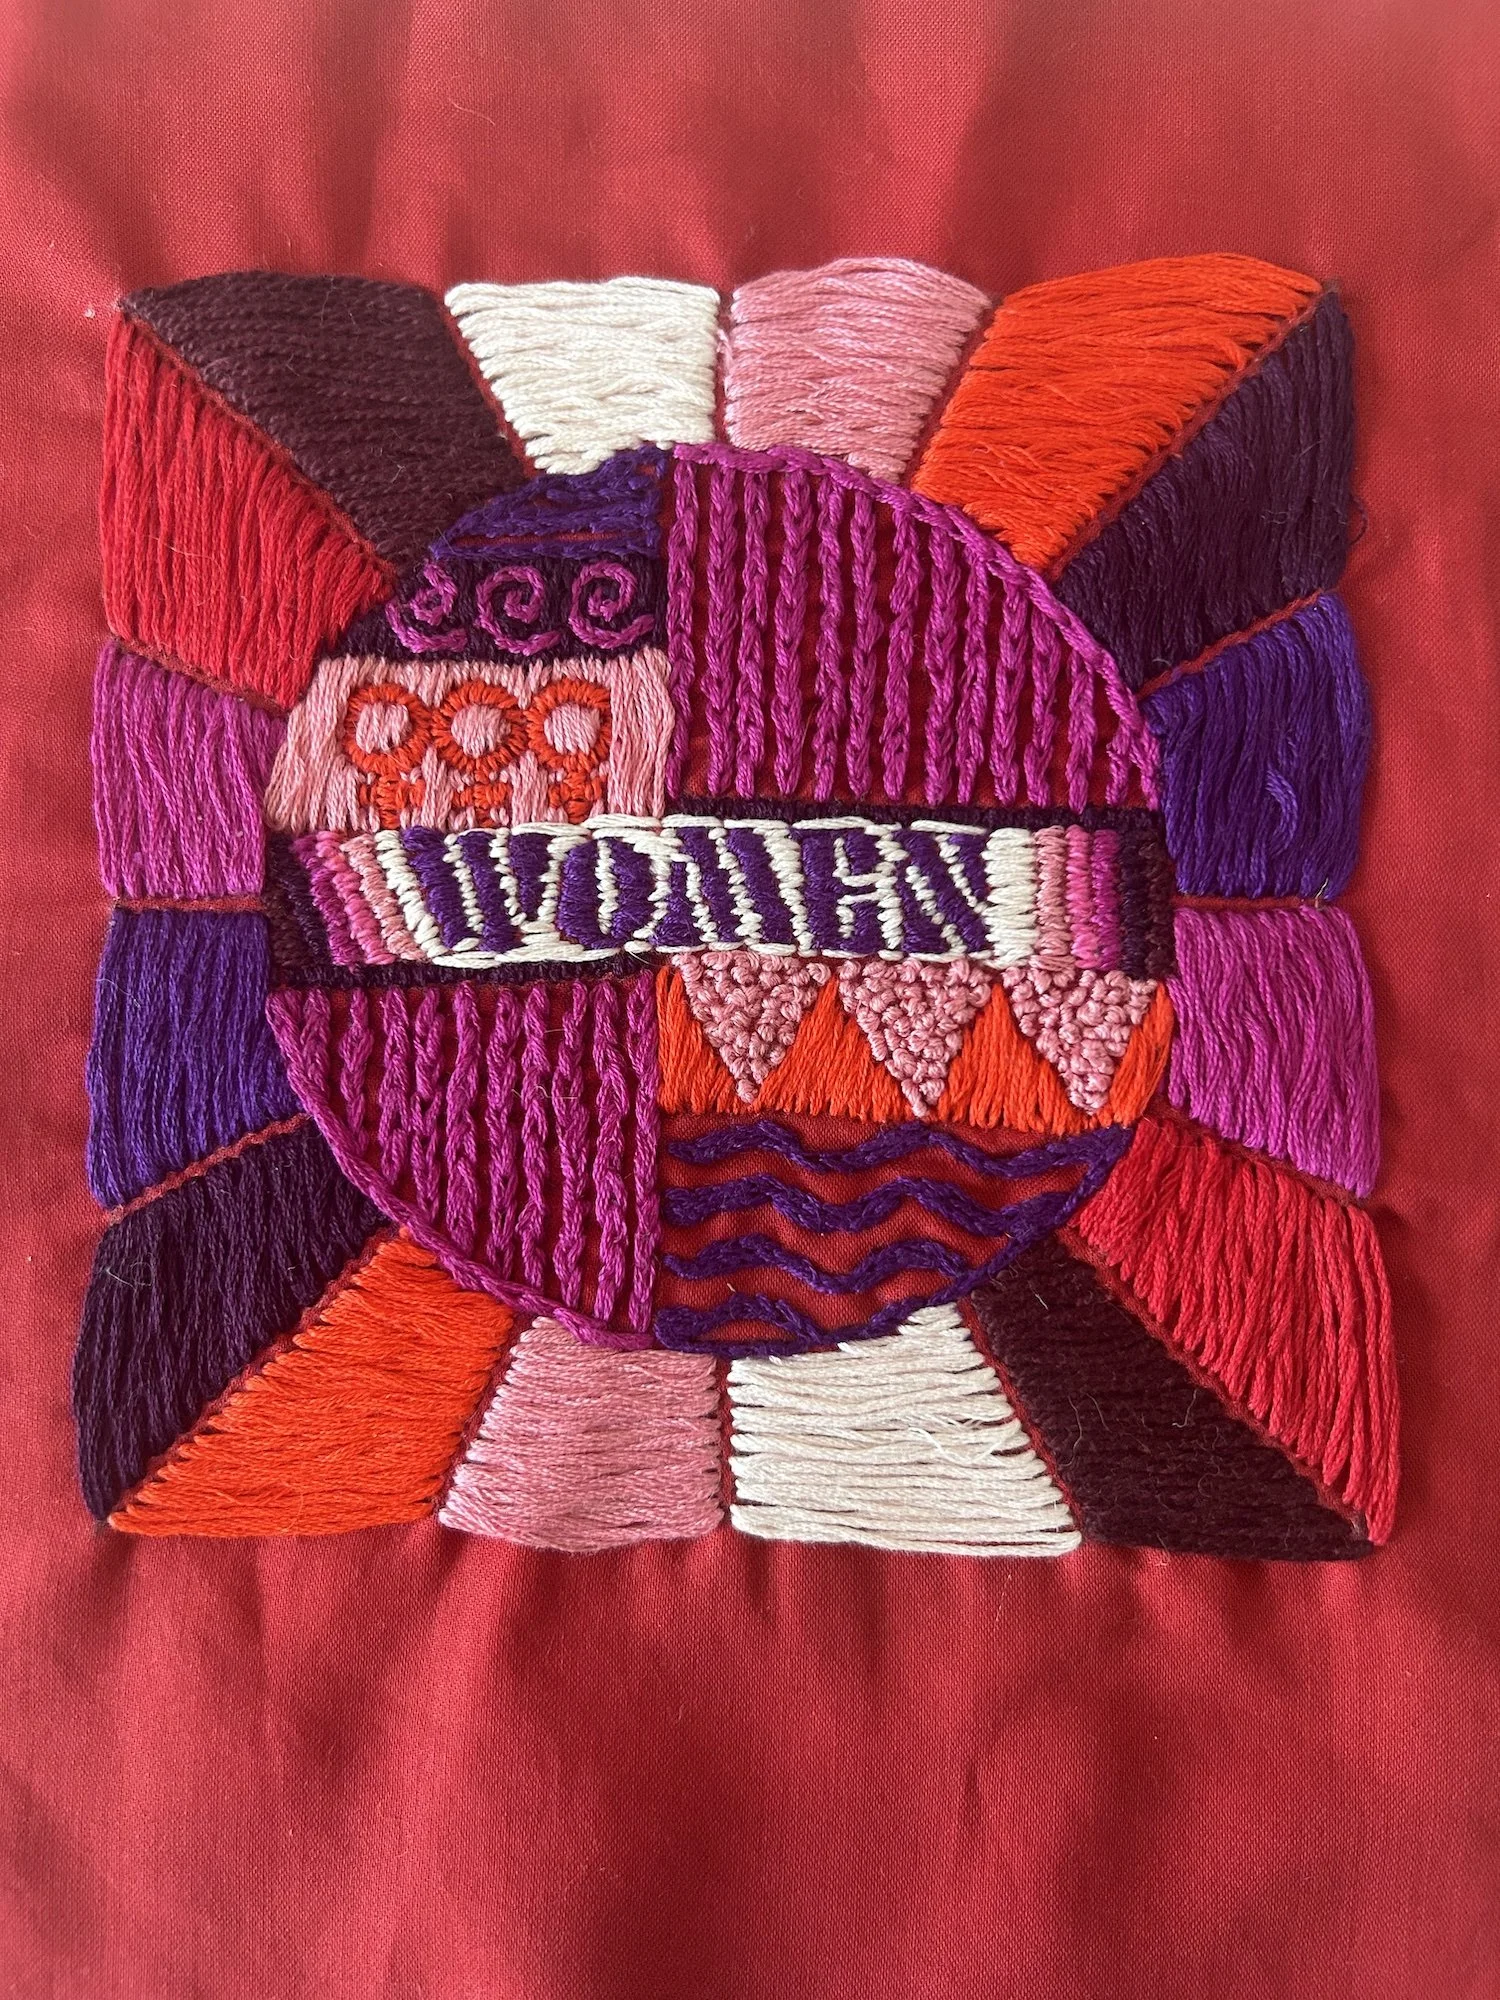
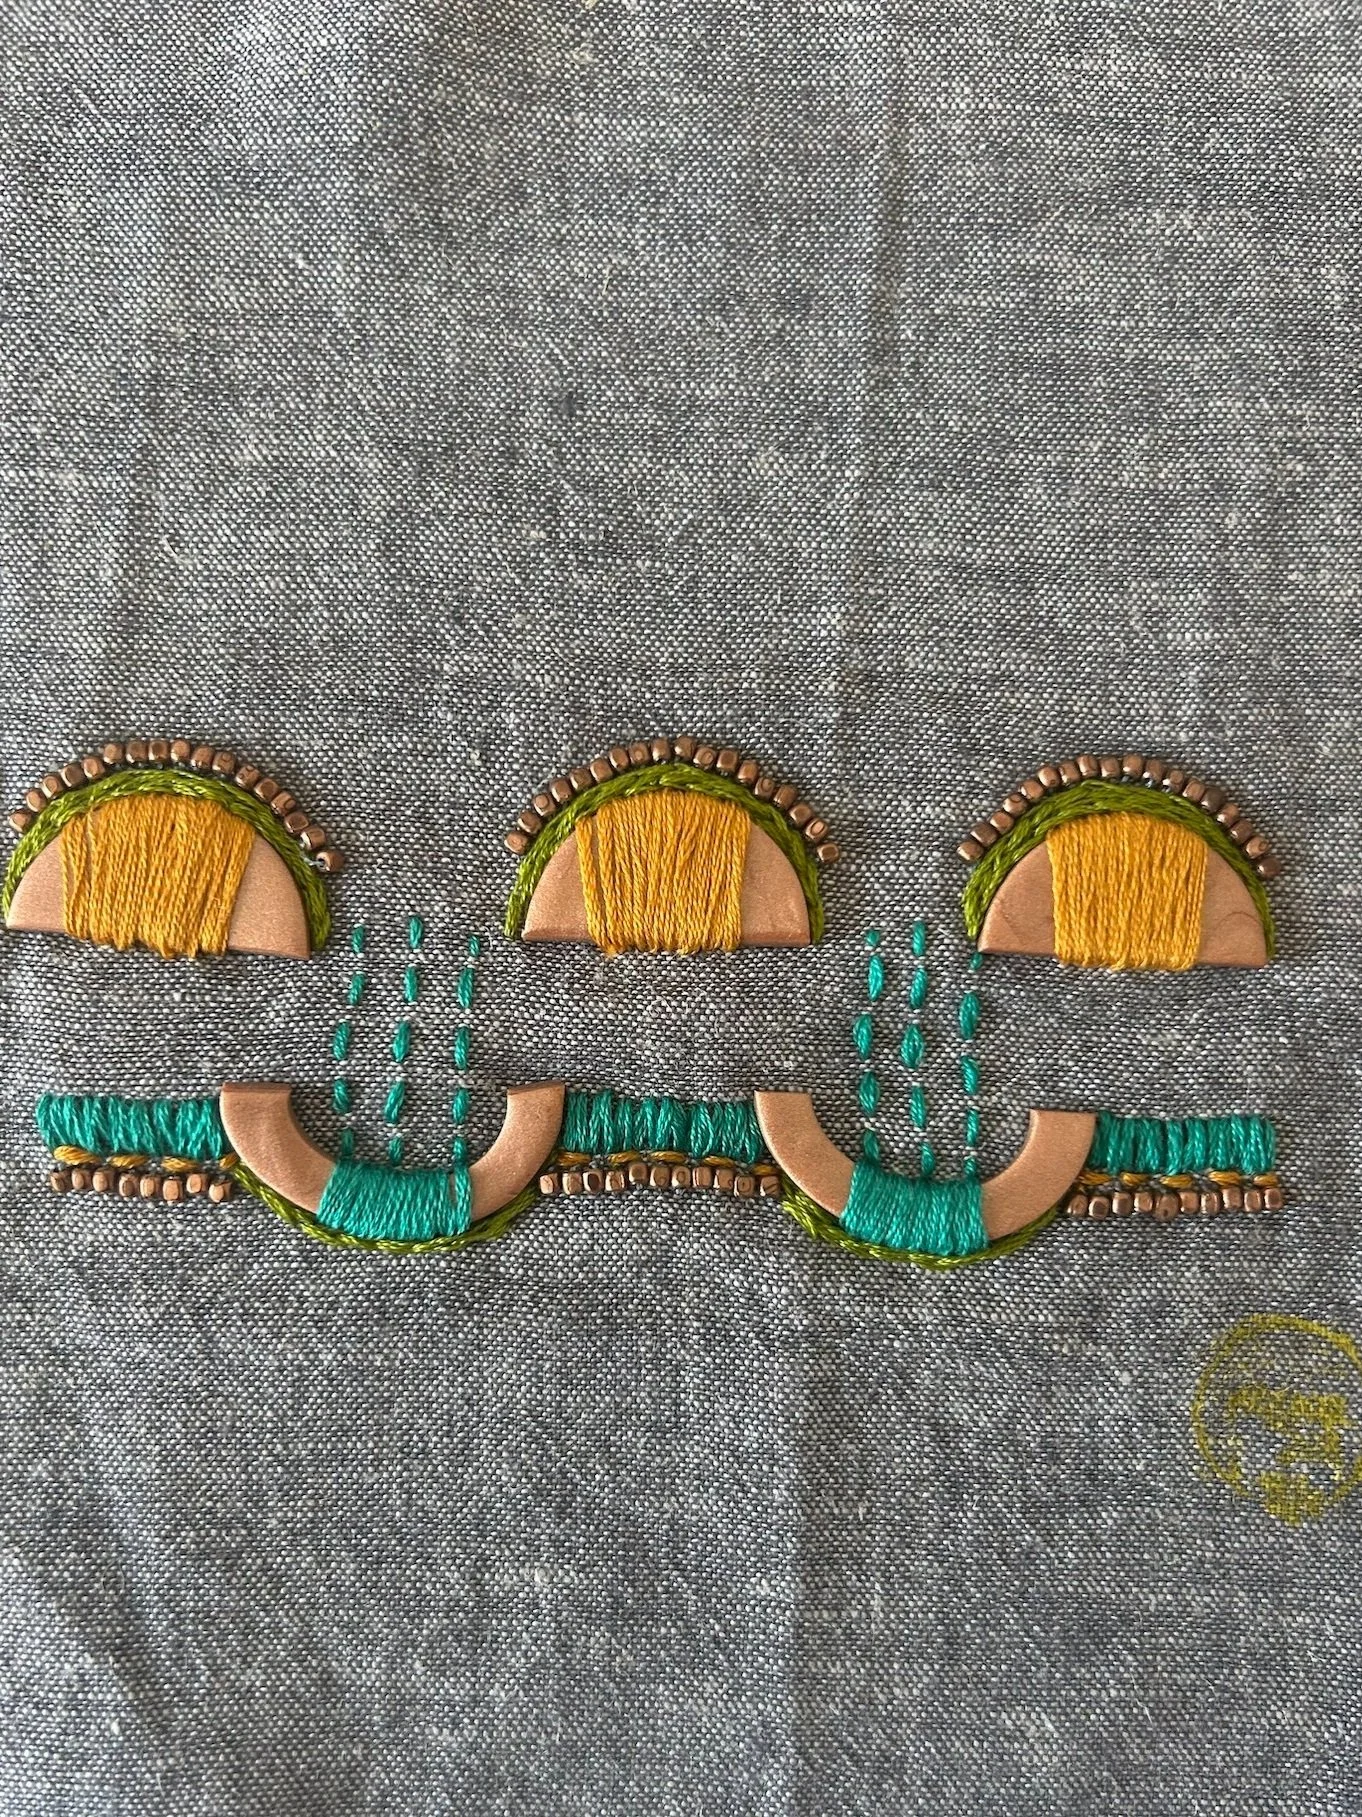
Satin stitch is well-suited for geometric designs and abstract patterns due to its ability to create clean, solid blocks of color. The smooth, flat surface of the stitch works perfectly for filling in shapes like triangles, squares, diamonds, and circles, resulting in a modern, polished look. When working with geometric patterns, you can experiment with bold color contrasts to create striking, eye-catching designs.
One of the advantages of satin stitch in geometric patterns is the freedom to play with the direction of your stitches. By changing the orientation of the stitches within each shape, you can create visual interest and a sense of movement, giving the design more depth. For example, in a pattern of concentric circles, the satin stitches in each ring can follow the curve of the shape, creating a dynamic flow.
Level Up Your Satin Stitch
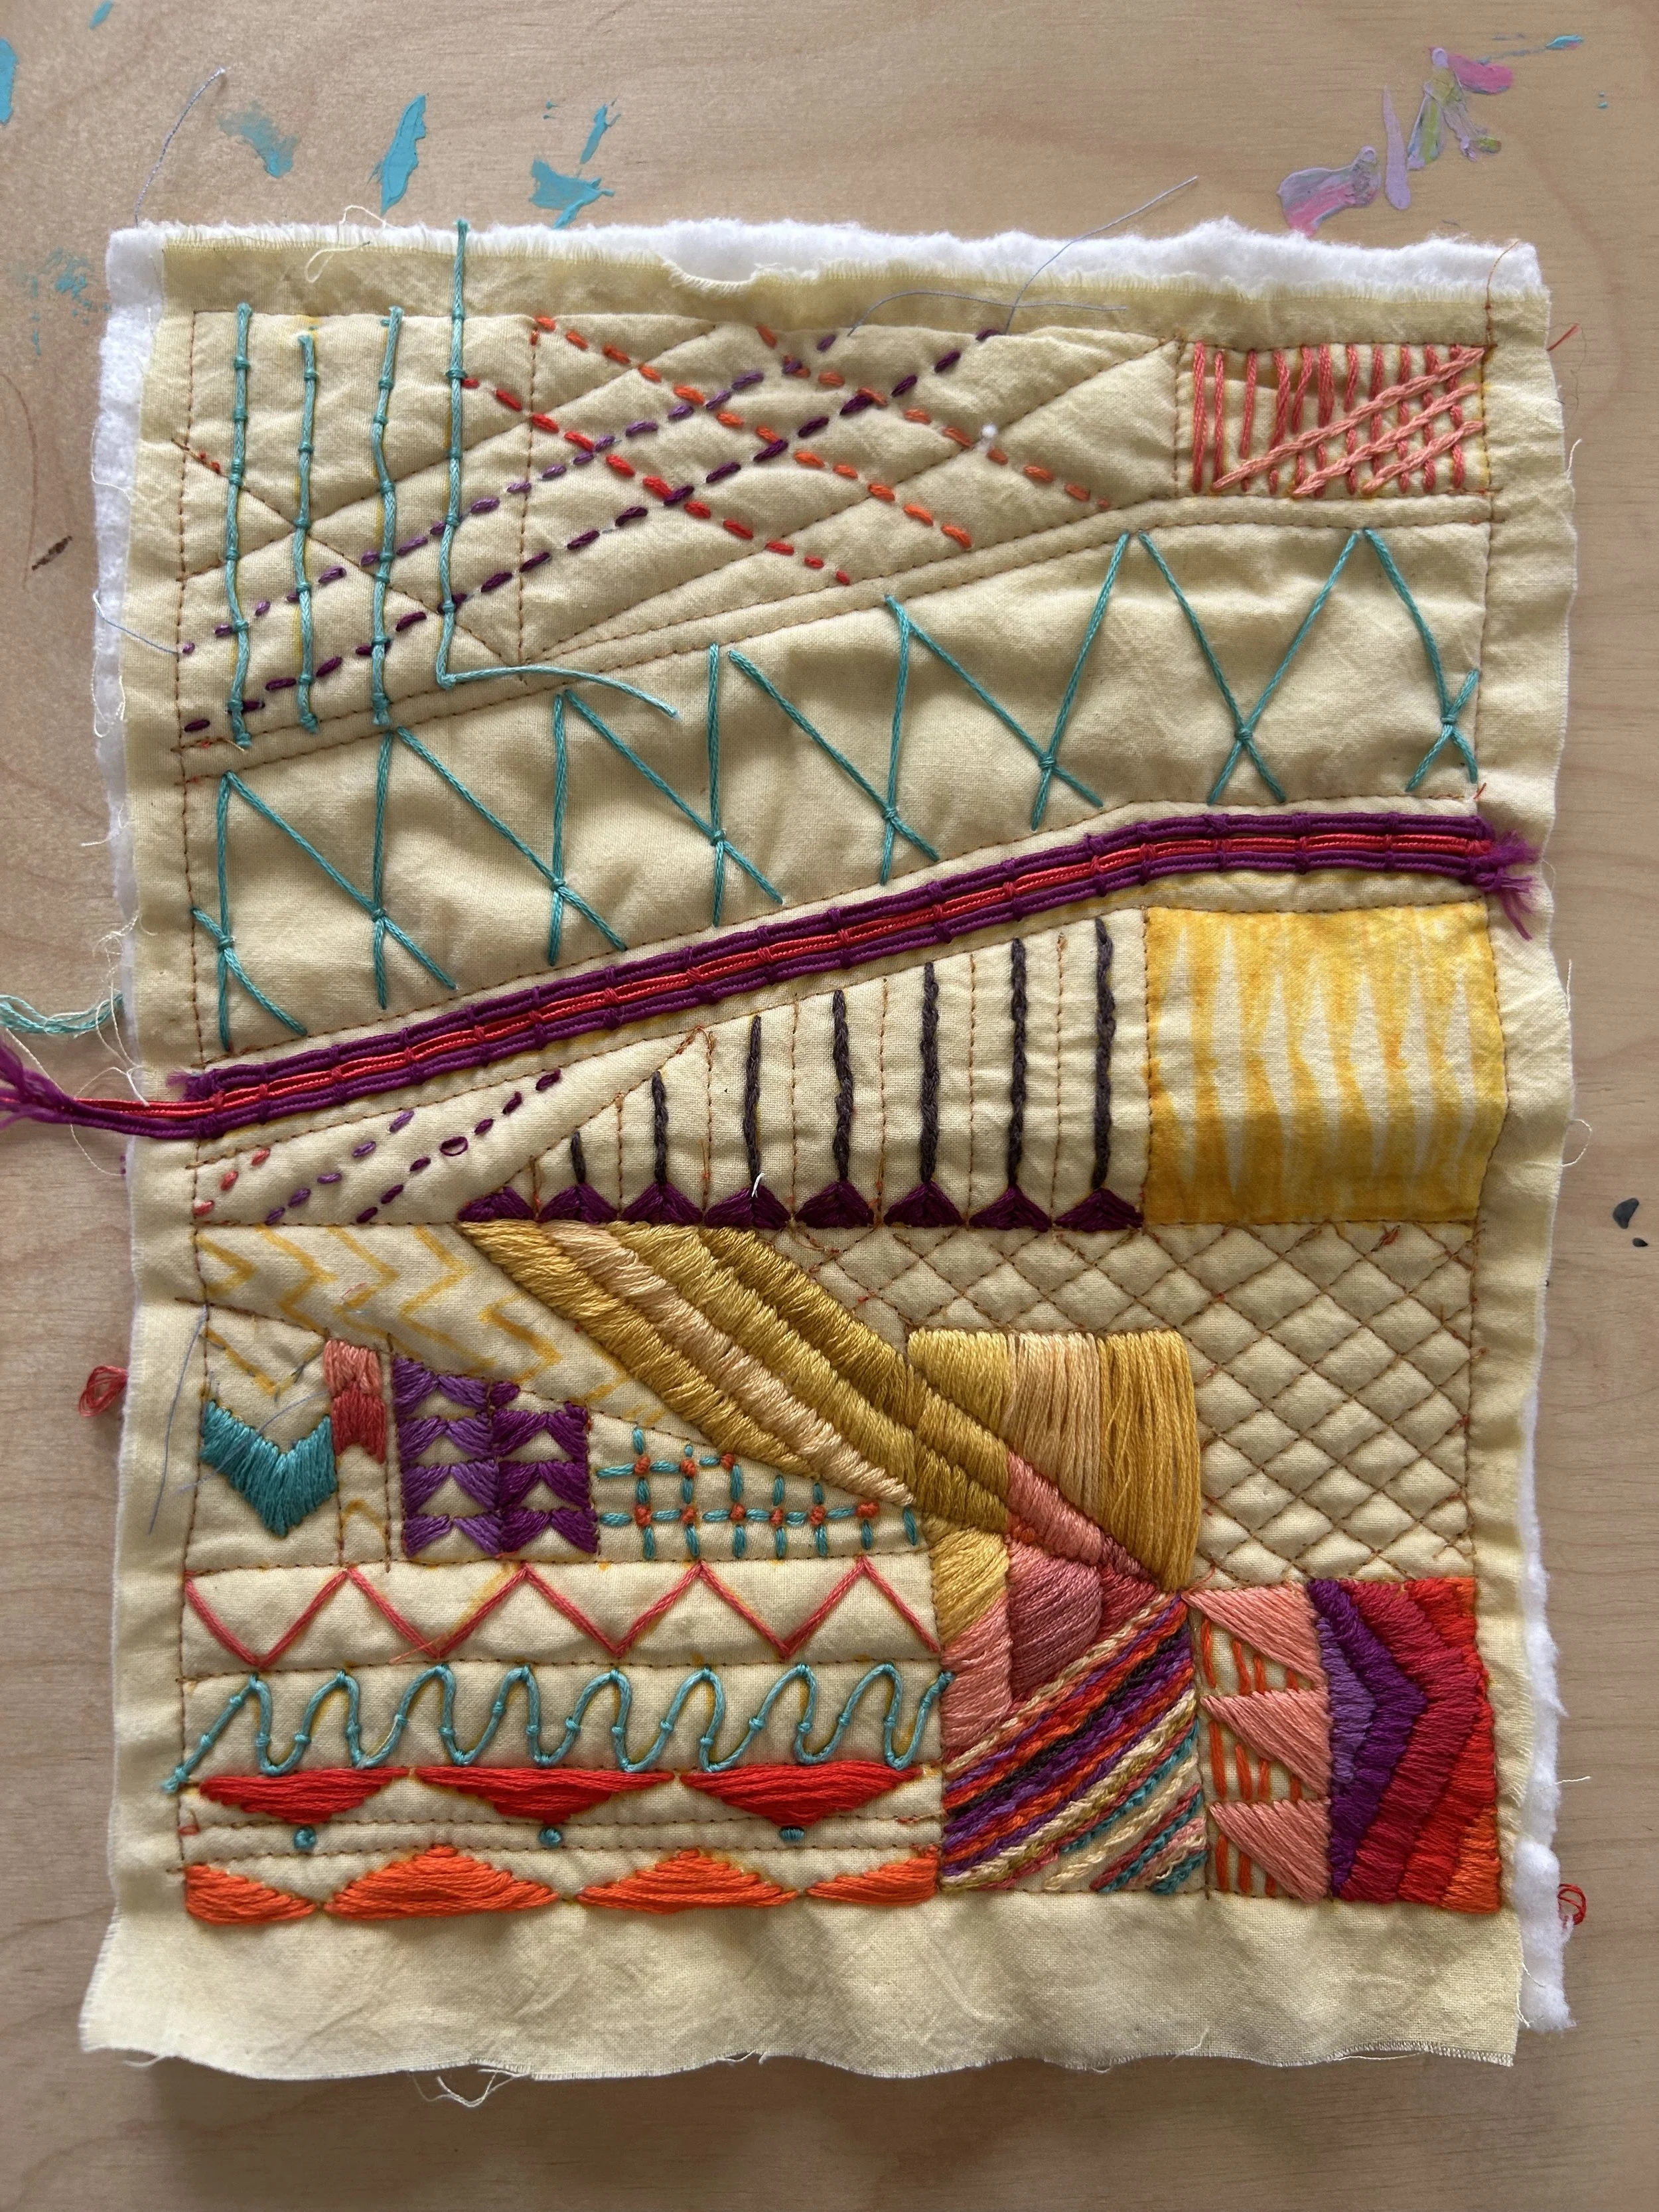
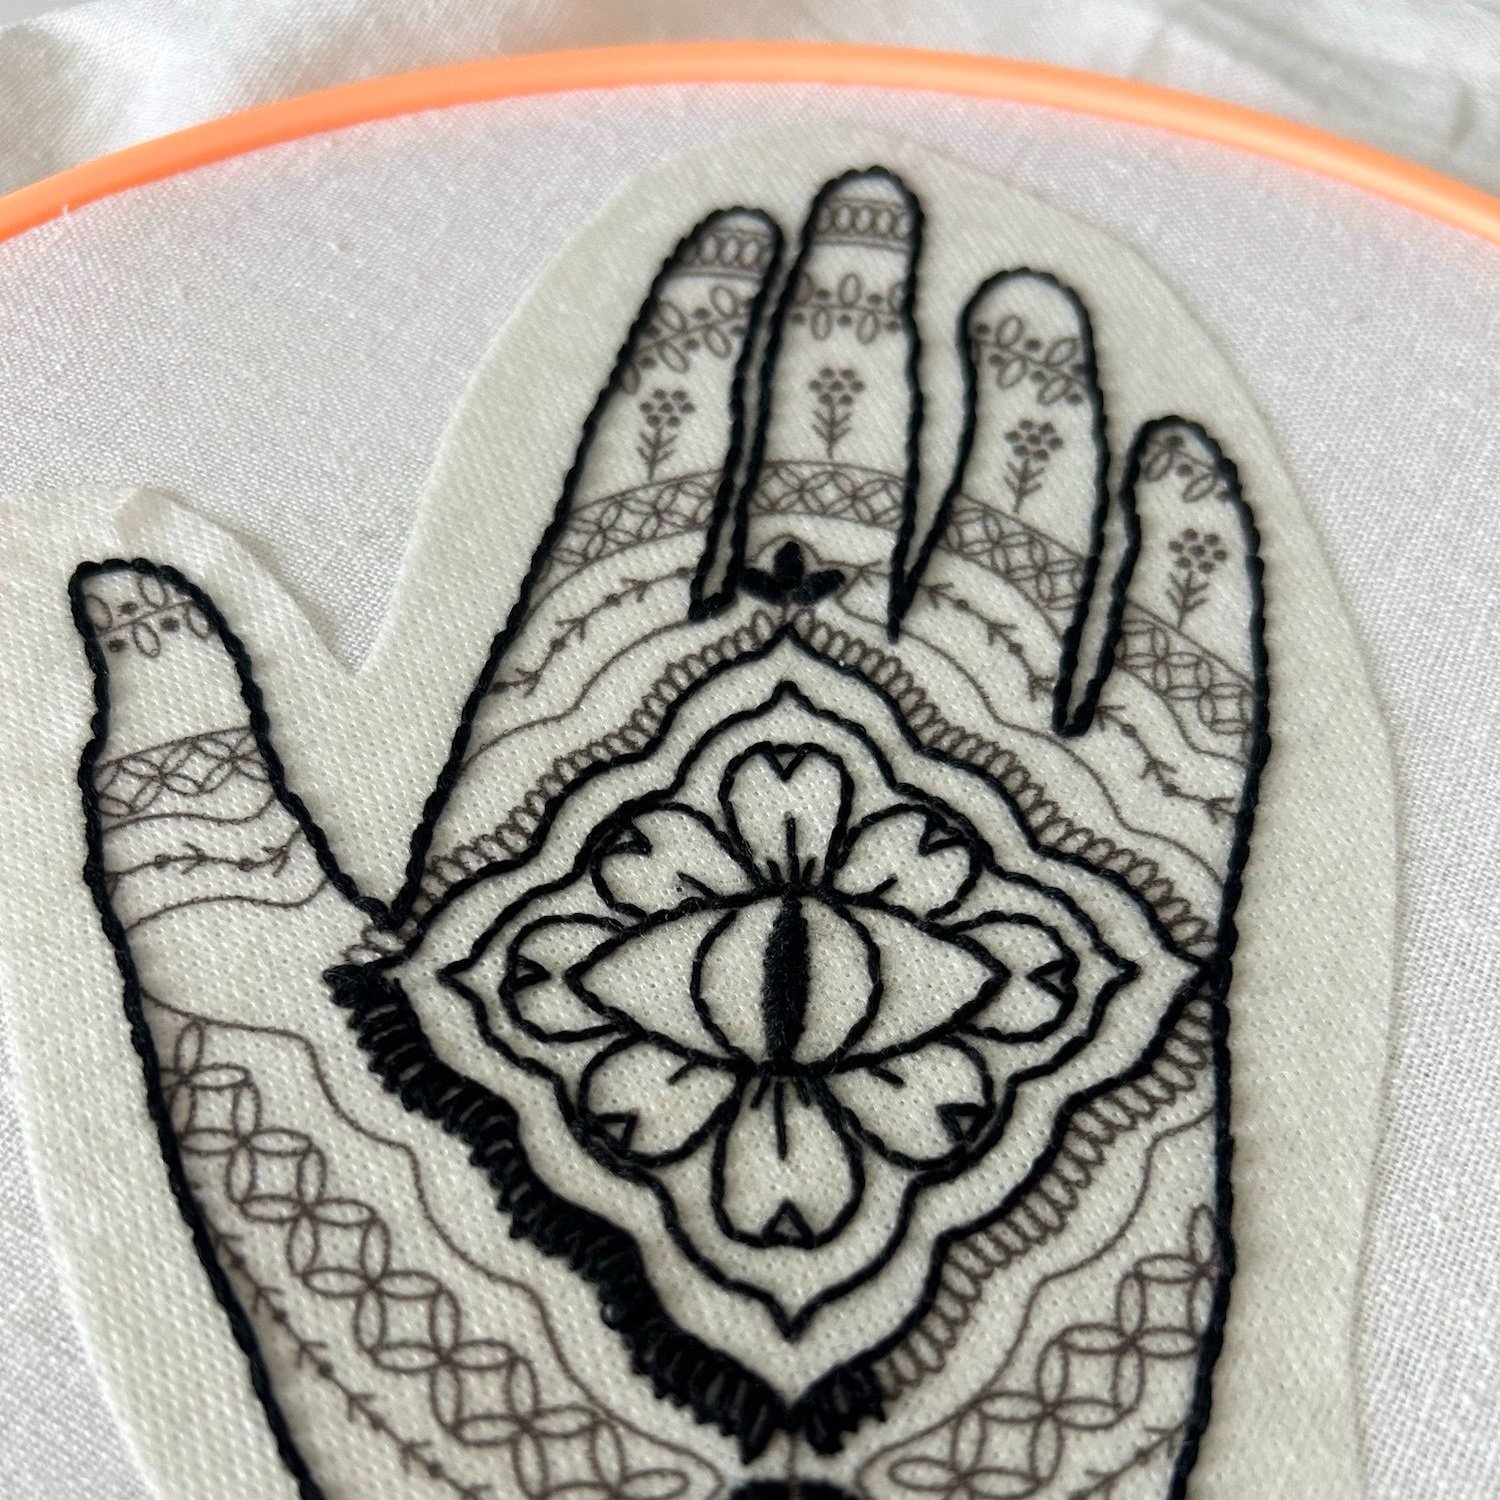
Another creative approach is using satin stitch in combination with other embroidery stitches, such as the backstitch or running stitch, to outline the shapes. This adds definition to the geometric forms and enhances the contrast between filled and unfilled areas.
Satin Stitch in Modern Embroidery
Satin stitch is particularly effective for creating minimalist, modern embroidery designs, where bold shapes and smooth surfaces dominate. Whether you're working on a small project, like a patch or a pin, or a large wall hanging, satin stitch will provide the perfect balance of simplicity and sophistication for your geometric patterns.
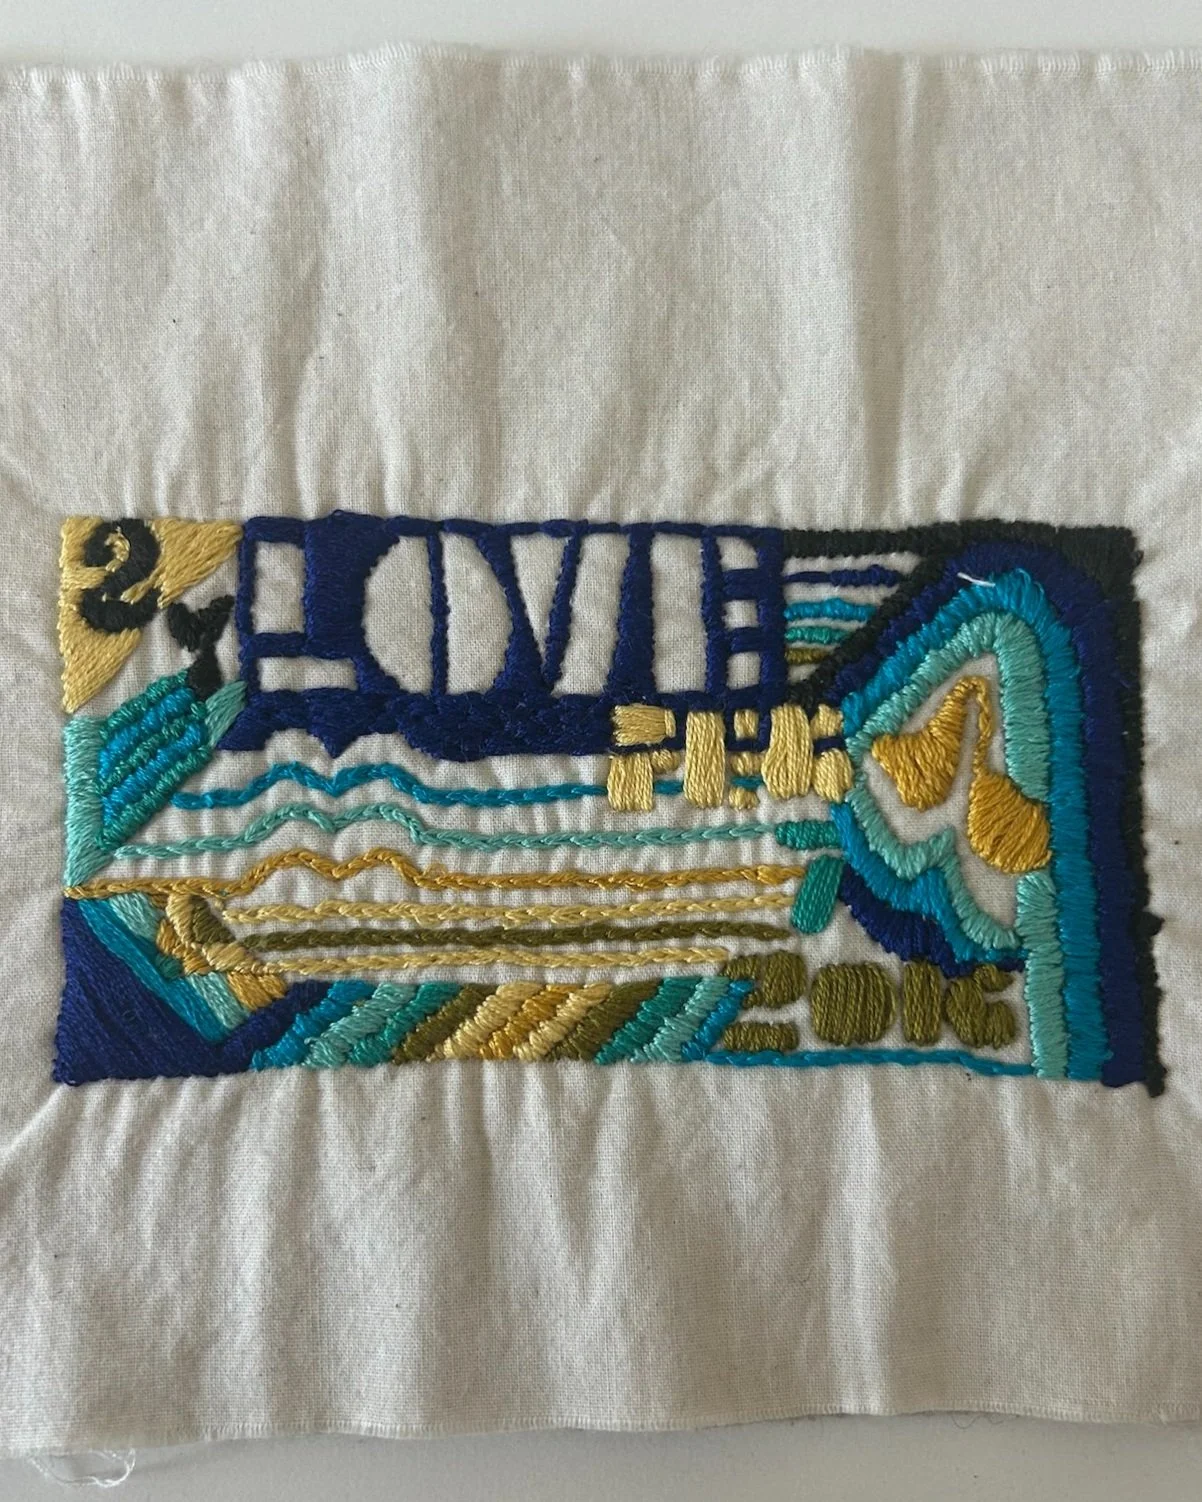
Examples of Satin Stitch in Modern Embroidery
The satin stitch is one of the most beautiful and versatile embroidery techniques, offering both beginner and advanced embroiderers the opportunity to add smooth, shiny textures to their designs. Its polished appearance makes it ideal for filling in shapes, creating monograms, adding texture to animal or floral embroidery, and crafting modern geometric patterns.
With practice and attention to detail, mastering the satin stitch can open up endless creative possibilities in your embroidery projects. Whether you're working on a traditional floral piece, a contemporary geometric design, or a personalized monogram, the satin stitch will help you achieve a sleek, professional finish. So, gather your supplies, start stitching, and let your creativity shine with the timeless elegance of satin stitch!

